Gone are the days when Instagram users were limited to posting their photos only in the form of cropped squares. As the popular social media app has grown its platform, it’s also increased the photo sizes allowed. You can still post in the classic square crop, but you can also post nearly full-length content in both vertical and horizontal formats.
While the possibilities are greater than ever with today’s Instagram, there are still restrictions on photo sizes. And if you’re not sure about the crop ratio or how to keep Instagram from posting lower-quality images, no worries. We’ve got you covered.
In this guide, we’ll go over all of the current Instagram image sizes to be aware of — and how to ensure that your content is being posted in the best format possible.

The Instagram Story size and aspect ratio
Unless you’re capturing and posting content directly with the in-app camera, it’s helpful to understand the different size requirements for Instagram. One good thing to note is that they are not identical across the board; there are different requirements for different posting formats, and the first one we’ll go over is Stories.
To upload a photo from your Camera Roll, it must be 1080 pixels by 1920 pixels. If you’re unfamiliar with these dimensions, that means your content will have to be 1080 pixels in width by 1920 pixels in height, which gives it an aspect ratio of 9:16 (“aspect ratio” is a term that refers to the ratio of a photo’s width to its height). These restrictions also mean that the maximum size in terms of megabytes (or MB) is 30MB.
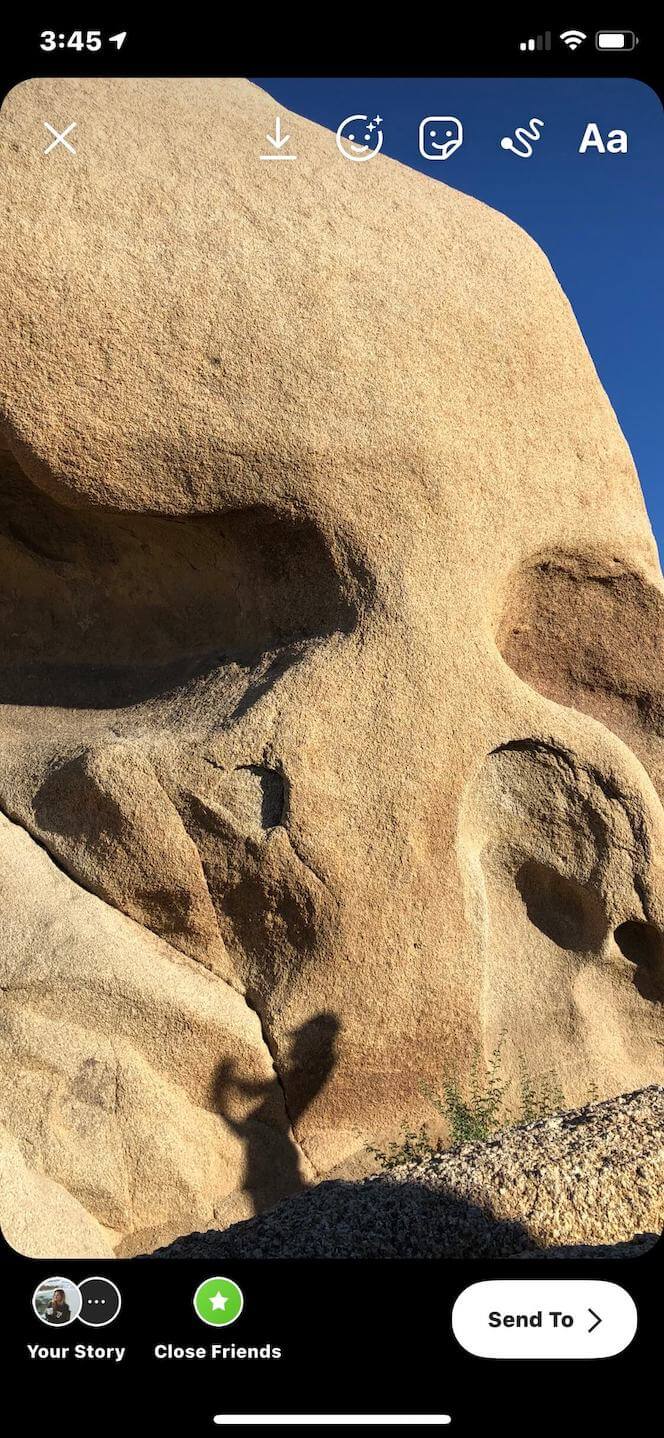
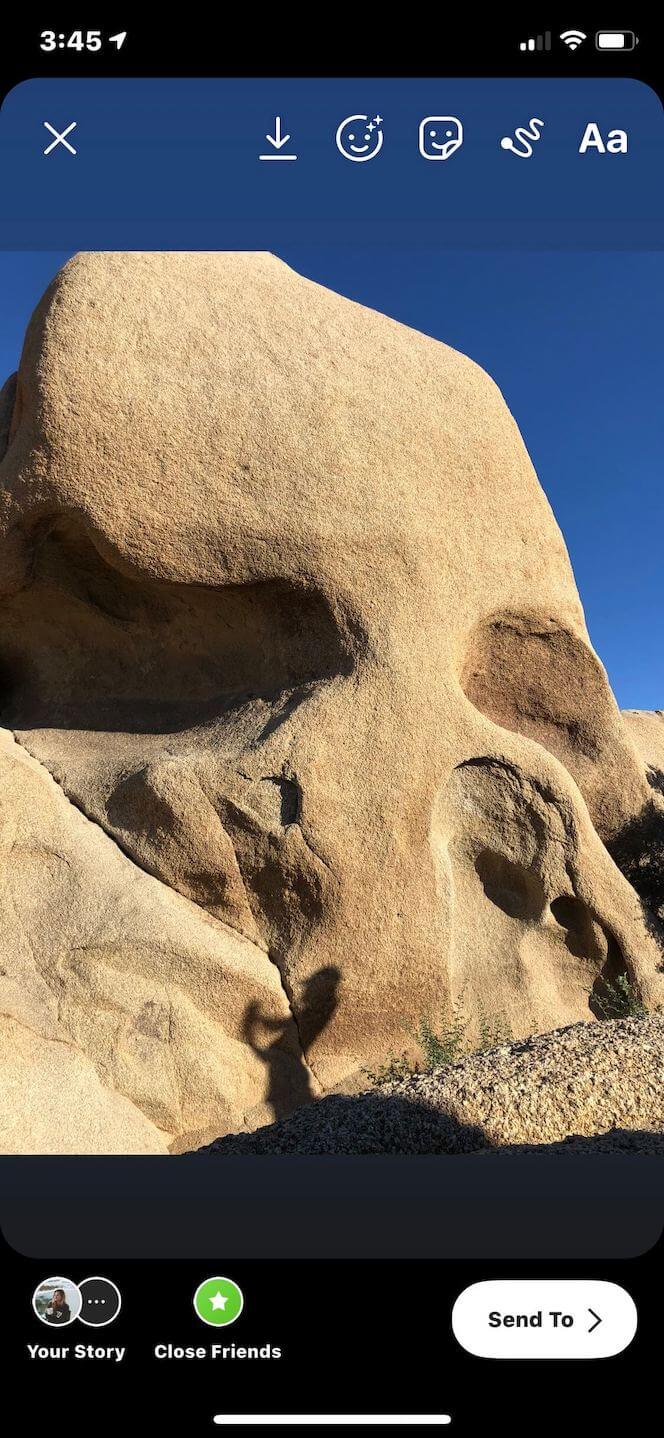
You can upload a photo that does not fall within these dimensions, but Instagram will crop it to fit, as displayed in the example below.
How to resize a photo for Instagram Stories on iPhone
However, if your photo doesn’t meet the Instagram Story requirements, you can easily resize it to fit. And you don’t even have to download any additional third-party apps to do so.
Here’s how to resize a photo for Instagram Stories through your Photos app on your iPhone:
- Open the Photos app.
- Navigate to the photo you want to resize.
- Press the Edit button at the top-right of the screen.
- Press the crop tool at the bottom-right of the screen.
- Press the sizing options button at the top-right of the screen.
- Slide through the options until you see 9:16.
- Select the 9:16 size.
- Adjust the photo to fit the size box however you like.
- Press Done.
After you complete those steps, your newly resized photo will be ready to be uploaded via Stories.
The optimal Instagram post size
When it comes to your Instagram feed, there’s a little more wiggle room in terms of photo dimensions. But not all sizes are created equal. There are some restrictions and varying optimal sizes for each photo format to help you publish the highest-quality post allowed.
Instagram square photo size
Sometimes, you want to keep it classic. And if that’s the case, then the square photo format is the way to go.
For this format, the recommended photo size is 1080 pixels by 1080 pixels, an aspect ratio of 1:1. Instagram will compress your file, so the photo that gets published on your feed will be closer to 600 pixels by 600 pixels.
Instagram portrait size and aspect ratio
Want to show off your full-length vertical pic? You can, so long as you adhere to the following requirements.
For vertical (also known as portrait) photos, Instagram recommends a size of 1080 pixels by 1350 pixels. That way, it will be displayed at 480 pixels by 600 pixels when compressed. The aspect ratio for that size is 4:5.
If you try to upload anything larger than that size — like an iPhone photo in its original 3:4 aspect ratio — Instagram will crop your content back down to 4:5.
Instagram horizontal photo size and aspect ratio
Horizontal (aka wide-length) photos are where things can get a bit complicated. Instagram recommends an aspect ratio of 1.91:1 or 1200 pixels by 627 pixels. However, you can actually post a horizontal photo as large as 16:9 or 1920 pixels by 1080 pixels.
As long as you make the height of your photo 1080 pixels, the quality of your image should be retained.
How to post a full-size photo on Instagram
By default, Instagram still crops your photo to a square aspect ratio. But a quick step in your posting process can revert your photo back to its full length. Here’s how to post a full-size vertical or horizontal photo:
- Open your Instagram app.
- Press the + button at the bottom-center of the screen.
- Navigate and select the photo you wish to post.
- Press the extension button at the bottom-left of the photo.
- Press Next.
- Add a filter if you’d like.
- Press Next.
- Fill in your caption and any other details.
- Press Share.
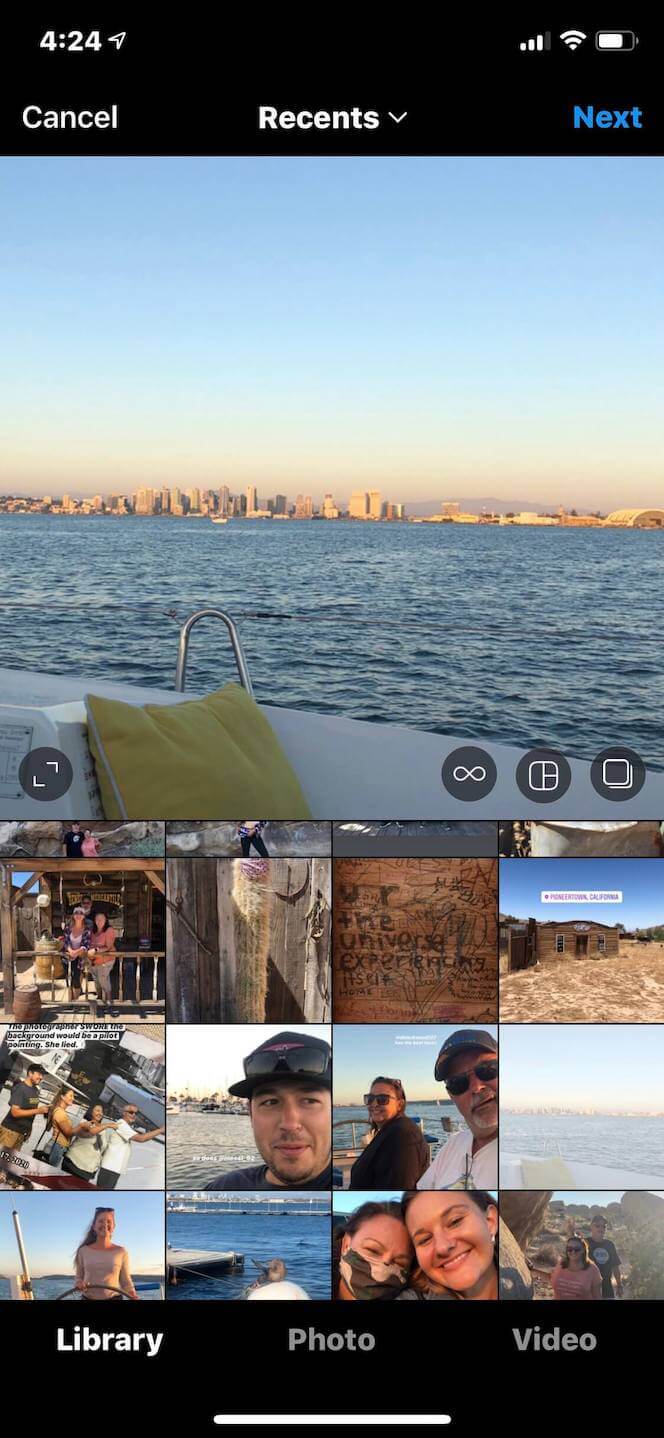
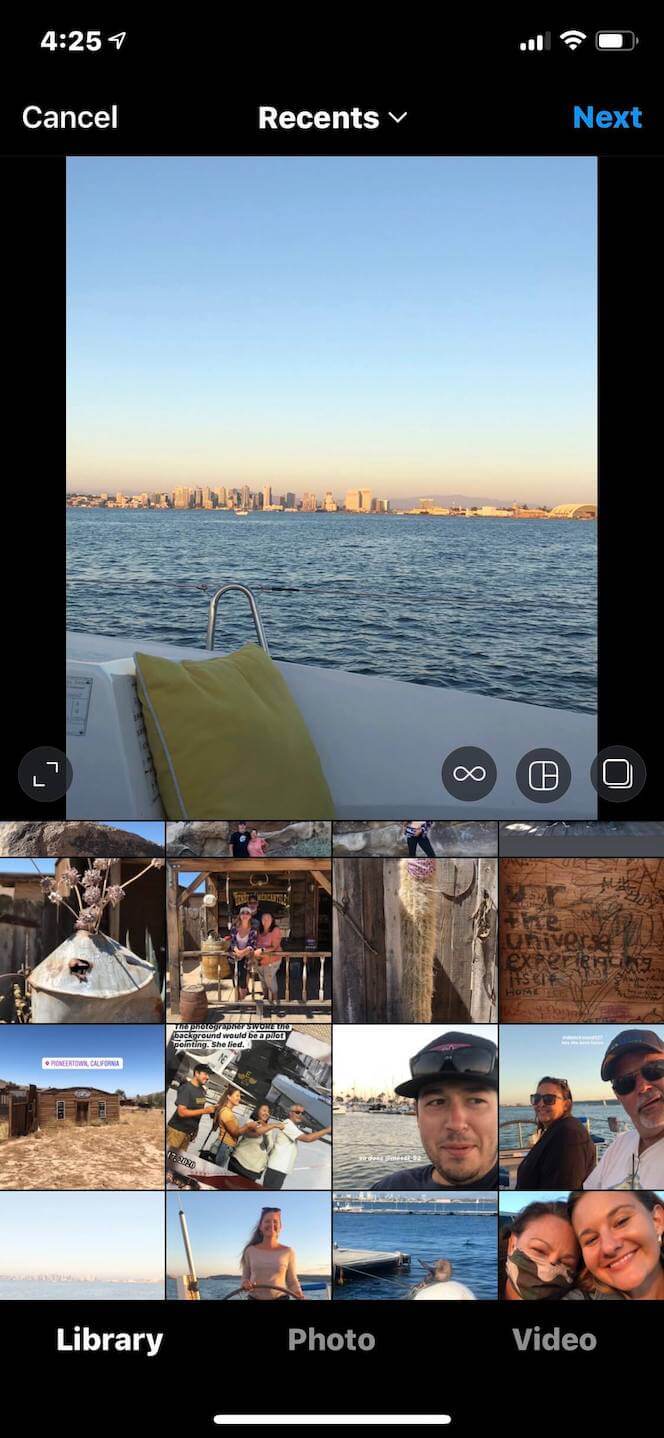
Remember: If you don’t follow the previously mentioned steps, Instagram will automatically post your photo in the square format. So, if you don’t want to publish a cropped photo, resize it to the allowed optimal size (see above) and follow the steps as indicated.
How do you post photos of different sizes in a carousel post?
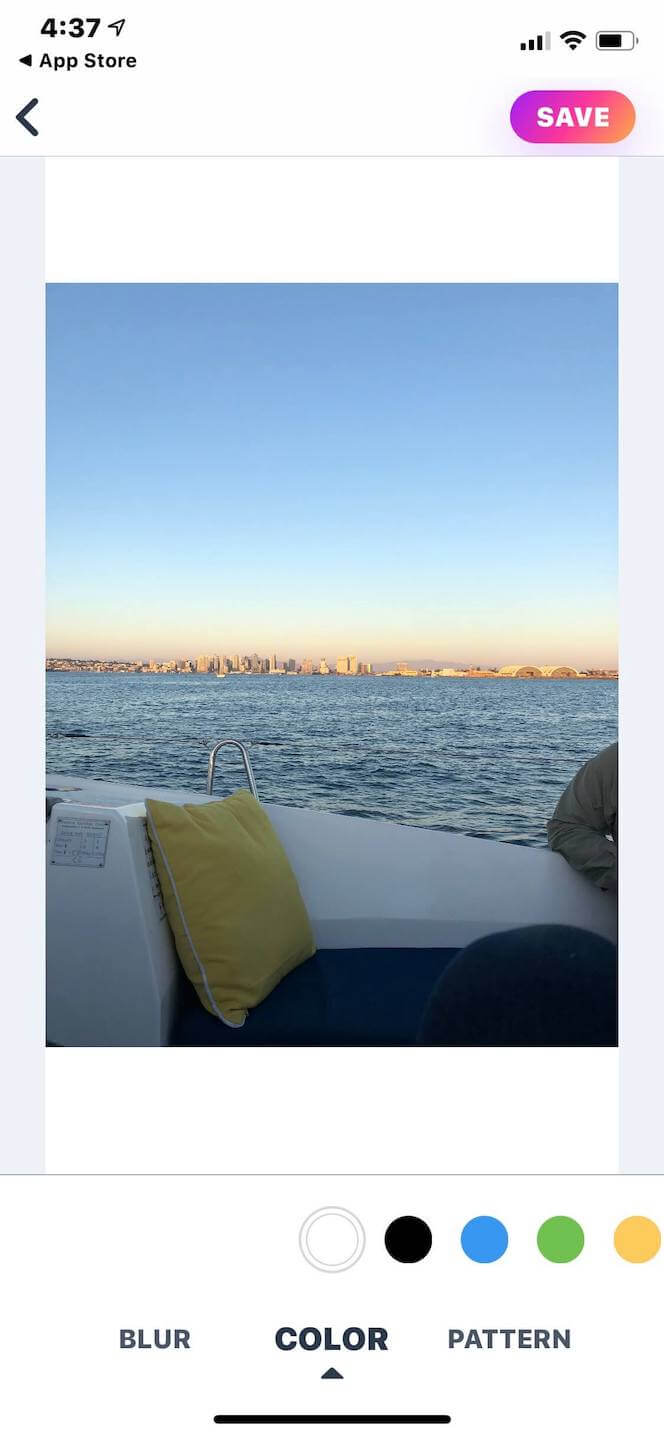
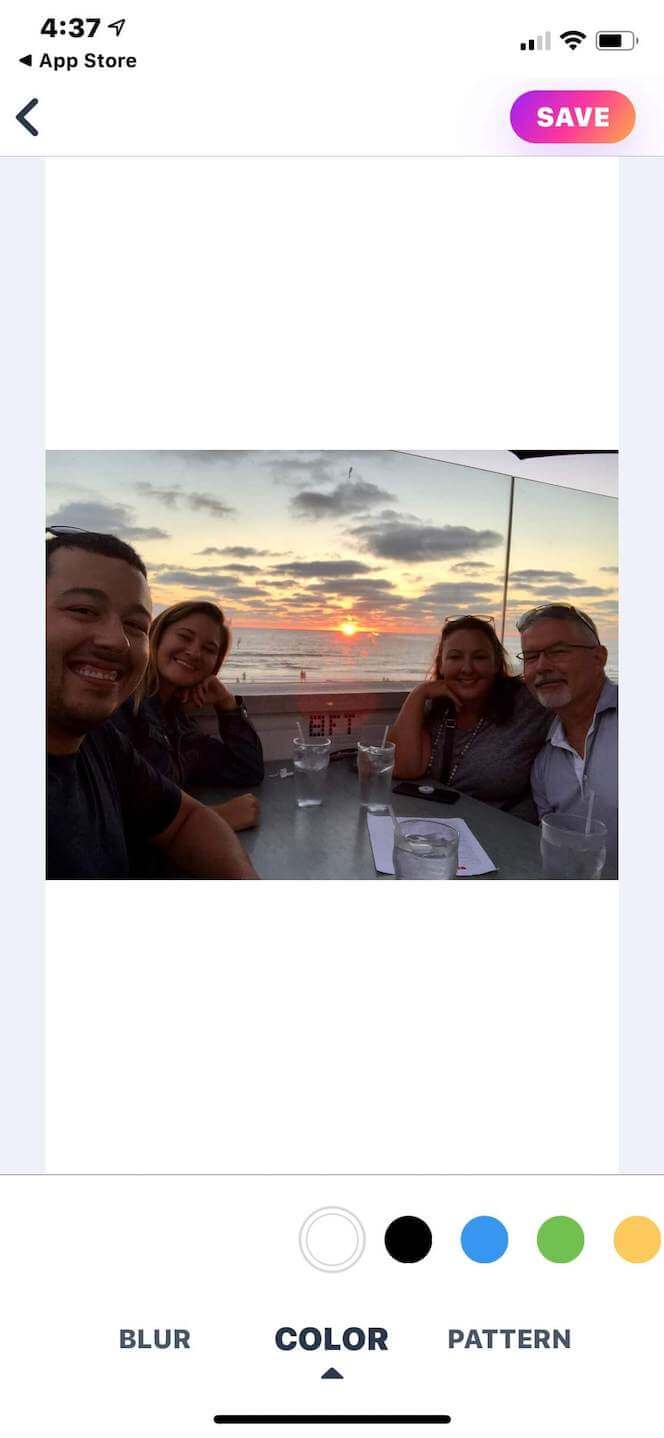
Another example of a time when things can get tricky is when you attempt to create a post using multiple images (also known as a carousel or an album post) featuring photos of different sizes. Instagram requires album posts to all be in the same aspect ratio. So, if you want to post different images in different sizes, you can do that by adding frames to them with the help of a third-party app. In this case, we’ll be using the free app No Crop For Instagram Story.
Here’s how to post photos of different sizes in a carousel post:
- Go through your Camera Roll and save the photos you want to use in your album to your Favorites folder so they’re easy to find.
- Open No Crop For Instagram Story.
- Select the first photo you wish to use in your post.
- Select Color.
- Choose your color (white is a popular option, but you can use any color you’d like).
- Press Save.
- Repeat the process with the rest of the photos with your carousel.
- Upload them to Instagram.
How to resize an image for an Instagram post
If you need to resize your photo for an Instagram post, all you have to do is follow some instructions similar to those used for resizing for your Instagram Stories.
Here’s how to resize a photo for Instagram using the iPhone’s Photos app:
- Open the Photos app.
- Navigate to the photo you want to resize.
- Press the Edit button at the top-right of the screen.
- Press the crop tool at the bottom-right of the screen.
- Press the sizing options button at the top-right of the screen.
- Slide through the options until you see an aspect ratio size that matches the Instagram photo format you’d like to use (Square or 8:10).
- Select the size.
- Adjust the photo to fit the size box however you want.
- Press Done.
Does Instagram lower photo quality?
Instagram is believed to be the culprit of many users’ photo quality issues. While it is true that the social media app compresses photos upon publishing, they do upload them at the highest-quality resolution possible, up to a width of 1080 pixels.
However, if you’re uploading an image with an aspect ratio that isn’t supported, Instagram will crop it to fit a supported ratio. If you’re uploading a photo with a lower resolution, Instagram will enlarge it to a width of 320 pixels, and if you’re uploading a photo with a higher resolution, it will be sized down to a width of 1080 pixels.
So long as you’re uploading within Instagram’s photo restrictions, your photos will not be low-quality.
The Instagram profile photo size
Finally, the last category of image restrictions you should be familiar with has to do with your profile photo. Displayed on your profile page, on your Story, and next to your posts, your Instagram profile photo must be a minimum of 110 pixels by 110 pixels. The maximum resolution allowed is 180 pixels x 180 pixels.
While uploading photos to Instagram is as simple as clicking a button — literally — it’s essential to make sure that the images you’re uploading fall within the platform’s size guidelines so that you’re only showing off the highest-quality content possible.


