High dynamic range, or HDR, is a widely used technique in photography. It’s incredibly useful for shooting a high-contrast scene where the highlights are blown-out and the shadows are dark and flat. HDR photography ensures that your shot is properly exposed throughout your composition.
HDR isn’t magic, but the results are near-magical, thanks to an iPhone processing technique that implements HDR in the background. This article will cover HDR and Smart HDR and how to use them on your iPhone.
What is HDR and Smart HDR on iPhone
No matter what iPhone you’re currently using, your camera has an HDR feature to help you shoot high-contrast scenes that are exposed properly. There is little guesswork to using HDR, as the post-processing takes place behind the scenes in your iPhone’s processor.


What does HDR mean?
HDR stands for high dynamic range, which allows your camera to exceed its dynamic range by stitching several photos together that accurately capture the different exposures of a scene. Dynamic range is the difference between the lightest light and the darkest dark that your iPhone can capture in a photograph. When the scene you are trying to capture exceeds the dynamic range of your camera, the result will be washed-out highlights and shadows that are simply black.
What is HDR on an iPhone?
On an iPhone, the camera’s processor automatically blends photos together — one to capture the bright highlights, one to capture the dark shadows, and one to capture the mid-tones. All of this happens behind the scenes, resulting in an HDR image that is accurately exposed.
What is Smart HDR on iPhone?
Newer iPhone models have what’s called Smart HDR, which uses Apple’s A12 Bionic chip to adjust the dynamic range using AI technology.
With the Smart HDR features, your camera shoots “buffer” frames before and after you tap the shutter. Each frame is captured in a different exposure so that your iPhone can capture every highlight, shadow, and background object in great detail. Once you have taken your photo, Smart HDR takes the best parts of each frame to create a perfectly exposed, high-quality photo.
iPhone models that have HDR and Smart HDR
No matter which iPhone you’re currently using, you’ll be able to take advantage of HDR or Smart HDR. Check your model to find out which one you’re using.
iPhones with HDR
- iPhone 4, 4S
- iPhone 5, 5S, 5C
- iPhone 6, 6 Plus, 6S, 6S Plus
- iPhone SE
- iPhone 7, 7 Plus
- iPhone 8, 8 Plus
- iPhone X
iPhones with Smart HDR
- iPhone XS
- iPhone XS Max
- iPhone XR
- iPhone 11
- iPhone 11 Pro
- iPhone 11 Pro Max
- iPhone SE (second generation)
Having HDR or Smart HDR isn’t the only difference between iPhone X and earlier models and newer ones starting with iPhone XS and XR. This iPhone X vs XR comparison will tell you more.
Using HDR on iPhone
If you are using an iPhone model with HDR, you will find the process fairly simple. The default camera setting enables you to keep HDR on or off for every photo unless you change it. Your camera will remember the setting that you choose.
How to turn on and turn off HDR
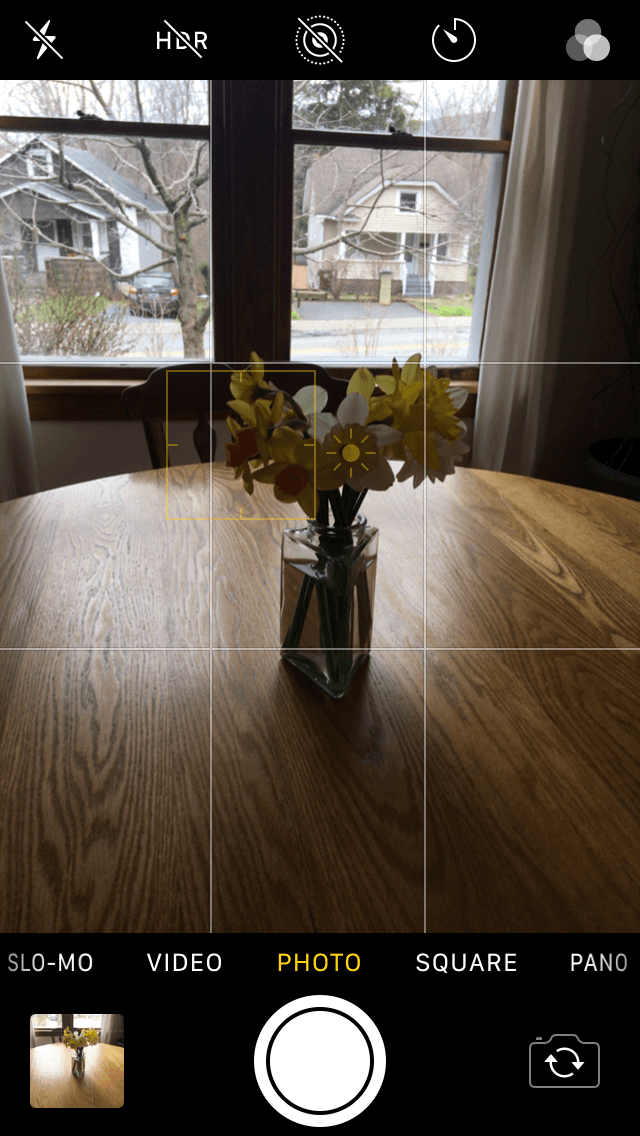
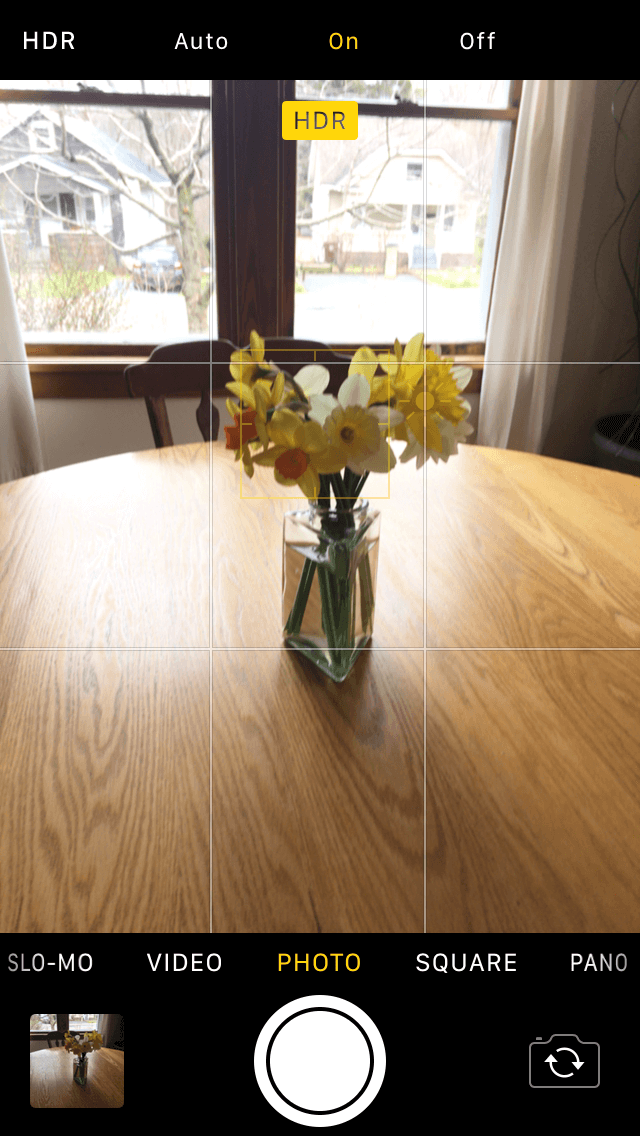
- Open your Camera app on your iPhone.
- Tap HDR at the top of the screen.
- Choose between Auto, On, or Off.
- Tap the shutter to take a photo.
Should HDR be on or off?
When you use the HDR feature, your iPhone will take two photos, one using HDR technology, and one without, so you will be able to choose the best photo. I almost always shoot with HDR on, which is what I’d recommend unless you are tight on space. HDR photos do take up more storage than normal photos.
Because an HDR photo is a combination of several photos stitched together, it will sometimes come out blurry. When that happens, simply delete it; you’ll still have a regular backup photo you can keep.
Are HDR photos actually better?
Not always. HDR photos work best when shooting high-contrast scenes with dramatic highlights and shadows. In low-contrast shooting conditions, you may not even notice the difference between an HDR photo and a shot taken without HDR. Having two photos stitched together may also cause blur, so be sure to hold your camera steady when using the HDR feature.
Why does HDR take two photos?
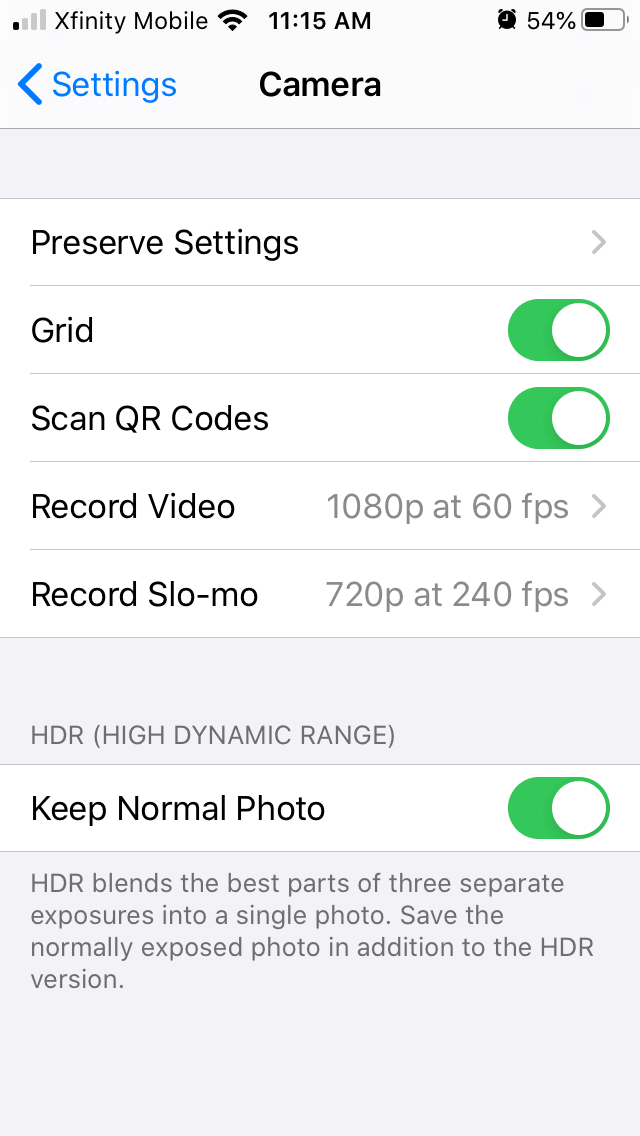
Using the HDR feature will add two photos to your Camera Roll. The first will be a normal photo without the HDR feature enabled. The second will be the HDR photo, which takes up a lot more space than the normal photo. Your iPhone does this so that you can choose the best-quality photo to keep. You can easily turn off this feature so that your iPhone only saves the HDR photo. Here’s how to do it.
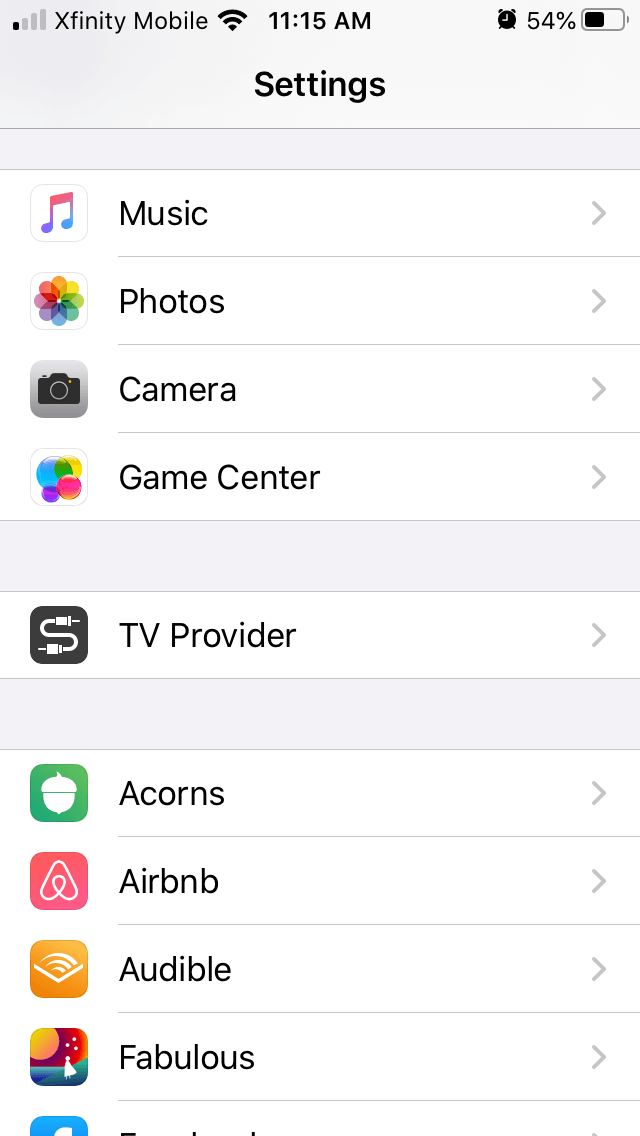
- Open the Settings on your iPhone.
- Scroll down to Camera.
- Under HDR, toggle off Keep Normal Photo.
Using Smart HDR on iPhone
Smart HDR is far more advanced than HDR, taking nine photos in under a second and stitching the best parts to make one incredible shot.
How does Smart HDR work on iPhone?
The good news for iPhone users is that Smart HDR is totally automatic, which means you can spend more time framing the perfect shot and less time fiddling with your camera settings. Smart HDR uses the best parts of nine separate photos taken before and after you tap the shutter.
Should I turn off Smart HDR?
If you are unhappy with the Smart HDR photos that your iPhone takes, you can certainly turn off the Smart HDR feature. When you disable Smart HDR, you will enable regular HDR, which works just like HDR in older iPhone models and must be turned on and off in the Camera app.
Here’s how to disable Smart HDR.
- Open the Settings app on your iPhone.
- Tap Camera.
- Scroll down to Smart HDR and toggle it off.
- Exit the Settings app.
HDR and Smart HDR use the power of the advanced iPhone processor to capture incredible details in your photos. The best part is that both HDR and Smart HDR will improve your photos with virtually no effort on your part. What’s not to love about that?

