There’s something magical about witnessing a sunrise or sunset. These brief moments in time are fleeting and so beautiful that it’s almost impossible not to whip out your iPhone to try to immortalize them. Of course, it’s not often that iPhone photos of sunsets and sunrises measure up to the real thing — sometimes, they’re downright boring. But what if we told you that with just a few creative tweaks, you could be shooting jaw-dropping sunset photography with just an iPhone? Say goodbye to boring sunset and sunrise photos, and hello to frame-worthy captures of the most beautiful time of day.
The basics of sunrise and sunset photography
First things first: Should you get up early to capture the rising sun or wait until later in the day when the sun is sinking behind the horizon? Where are the best locations for taking sunrise and sunset photos? And when you find a great location, how do you capture the sun in all its glory? Let’s answer these questions and more with a deep dive into sunset and sunrise photography on iPhone.
Are sunrise or sunset photos better?
It’s a toss-up as to which time of day is best for fantastic photos. In our opinion, it largely comes down to personal preference and variations in location. As the sun rises and sets at opposite points on the compass, you have to work within the limitations of geography — not to mention the time of day that works best with your schedule.
There are pros and cons to either option. When capturing a sunrise, you will often have fewer people to deal with, less atmospheric haze, and cooler tones. By contrast, sunsets produce warmer tones with brighter colors that stick around longer than sunrise colors. When in doubt, capture them both!
What is the best time to take sunset and sunrise pictures?
The setting and rising sun produce optimal lighting conditions for all types of photography. If you’re short on time, give yourself a total of 30 minutes for sunset/sunrise photography (15 minutes before the sun sets or rises and 15 minutes after). If you can stretch this timeframe out to a half-hour on either side of the sunset or sunrise, all the better.
Where should the sun be in your photos?
The closer the sun is to the horizon in your photos, the larger and more striking it will appear. To add interest to your photos, position the horizon line in the top or bottom third of the frame depending on whether you want to focus on the sky or the foreground. You can also compose or crop your shot so that the sun is off-center, which will add a bit of drama to the final image.
How to shoot creative sunset portraits
The warm glow of the sun as it sets is ideal for beautiful portraits. Here are a few tips for getting the best sunset portraits with your iPhone.
1. Lock in your exposure and your focus
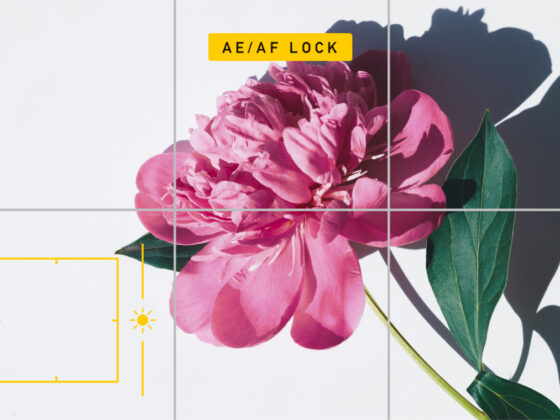
Because there is a large difference between the lightest and darkest parts of the image in most sunset shots, it’s important to lock in proper exposure before taking a photo. Fortunately, on iPhone, this is as easy as a finger-tap.
If you expose for the sunset, your subject will be too dark. Instead, expose for your subject by framing your shot and holding your finger on your subject’s face on your screen. If the image still isn’t exposed properly, you can use the slider that pops up on your screen to manually adjust the exposure. Note that exposing for your subject may make the sky appear brighter than you want it. Bright, overexposed skies are trendy right now, but if that isn’t the look you’re after, you can always adjust the brightness using a photo editing app.
2. Plan your sunset portrait shoot to coincide with the best lighting
The hour before sunset is called the “golden hour” for a reason. This hour-long period of beautiful, warm light works well with a variety of skin tones. Here’s how to take advantage of the quickly changing light while shooting portraits during the golden hour.
- Afternoon shade: The sun is still pretty high an hour before sunset, so during this period, place your subject in the shade. You’ll still get the benefit of the warm tones from the sun without those pesky shadows.
- Filtered light: As the sun sinks lower, you can start introducing light onto your subject, either by shooting in filtered sunlight through trees or foliage.
- Silhouettes: With the sun low in the sky, now is the time to shoot directly into it for dark silhouettes of your subject. Shoot fast for this one; you can even use Burst mode so you’ll have a lot of different poses to choose from.
- Sunset: As the sun heads behind the horizon, get closer to your model for some up-close images. Utilize the sinking sun as a backlight for your model. And try taking a few photos with the sun shining directly on your subject’s face.
- Dusk: Once the sun has disappeared, you can capture your subject with the cooler tones and reduced shadows that the “blue hour” provides. Dusk is lovely for wider angles that feature more of the landscape.
3. Create lens flares by shooting into the sun
Using the sun to light up your subject from behind is a recipe for dreamy photos. Make your images even more unique by capturing naturally occurring lens flares from the sun reflecting off of your camera’s lens. As the sun sinks lower, you can position your iPhone in such a way that a lens flare will appear. Simply adjust your angle until you can see it on your screen. Make incremental adjustments to change the amount and position of the flare. As an added tip, use Burst mode as you experiment with angles to capture a variety of different lens flares within your images.
4. Use a reflector to bounce light onto your subject
A reflector is a useful tool for shooting sunset portraits because you can quickly reflect light onto your subject’s face before pressing the shutter button. If you can enlist the help of an assistant, a larger reflector is a great option, but in most situations, this portable hand-held reflector is all you need. Just use one hand to reflect the light and the other to take your photo. A tripod and a remote shutter can also help.
5. Practice shooting silhouettes for more creative sunset portraits
Silhouettes capture your subject as a dark shadow in front of a bright light source and are fun to create during sunset shoots. While silhouettes don’t focus on the details of a subject, they can capture the essence of a scene, as well as some unique poses. To capture a dark silhouette against a lighter background, use the AF/AE lock on your screen to expose for the brightest part of your photo. This will make the subject nice and dark. You can also adjust the exposure later with an editing app.
Sunset landscape photography tips
The setting sun has been photographed so many times that it can almost feel like a visual cliché. To avoid photos that feel tedious, find new locations and practice creative compositions by introducing some variety into your sunset photography. It may be the same sun every day, but sunrises and sunsets differ depending on the weather and atmospheric conditions. Here are some tips for creating unique sunset photos.
1. Use a shallow depth-of-field in your sunset photos
A shallow depth-of-field is a great way to capture the sunset while focusing attention on a more detailed subject in the foreground. Start by framing your subject in front of the setting sun. Bring your camera in close to the subject and hold your finger on the screen to lock the focus. When you tap the shutter, you will capture your subject in all its golden-hour glory with only the essence of the sunset in the background.
2. Look for a unique foreground
The best way to add depth to your sunset photos is to add an interesting foreground to your image. An expanse of ocean horizon with a setting sun behind it will appear flat and boring. But crashing waves on the nearby rocks with the sunset in the background? That’s more like it! Experiment with objects like boats, piers, flowers, and trees to give your photo more depth. Now the sun doesn’t have to do all the work.
3. Find leading lines in your sunset composition
The use of leading lines can create an interesting foreground and evoke a sense of drama as the foreground draws the viewer into the photo. For the best results, make the sun the anchor, with a leading line, whether real or imaginary, inviting your viewer on a journey to get to it.
4. Look behind you while the sun is setting
All eyes are usually on the sun as it sinks below the horizon, so most people ignore what’s going on behind them. Turn around during the sunset, and you might be surprised to find gorgeous colors in the sky, perfect warm light on the landscape, and a composition that is even more unique than what’s in front of you!
5. Stick around after the sun goes down
Many of us are guilty of oohing-and-ahhing over the sun sinking behind the horizon, then immediately packing up and heading home. But the next time you find yourself in a beautiful spot with the setting sun, stick around for the final act. After the sun sets, the colors deepen and darken, creating beautiful light for landscape photography. iPhone camera sensors have improved dramatically over the years, so you should have no problem capturing the tricky lighting conditions as the sky turns purple and then blue. Switch to Night mode if your photos aren’t bright enough.
Sunrise and sunset photography is incredibly popular — and so easy to get wrong. The next time you head out to photograph the golden hour, expand your creative limits by trying out some new compositions and techniques. Not only will you have more fun, but you’ll be rewarded with beautiful sunrise and sunset photos that are anything but boring.


