It’s no secret that the iPhone can capture incredible quality videos. In fact, there have been quite a few professional filmmakers who have used these mobile devices to make feature-length movies. But, with great quality comes even greater file sizes. So, for everyday users like you and me, this is all nice to have – until you want to share that video.
Whether you’re trying to send that video directly to a friend or upload it to social media, the larger the size of the video, the more problems it comes with. That’s why in this article, I want to show you how to send long videos on iPhone using various methods. You’ll read the answer to how long can a video be to send through text message on iPhone and for other methods like email and AirDrop.
How long can a video be to send?
This is a bit of a tricky question because the answer depends entirely on how you’re trying to send the video on. That being said, here’s a list of some of the most common methods and their video length limits at the time of writing this:
- Text messages (MMS): The limit is usually around 600KB, which translates to a video of just a few seconds. Note that if you have iCloud, you can send videos up to 5GB in size via iCloud, which the Message app will automatically adjust for you.
- Email: Again, this depends on the email platform, but most services will allow you to attach a file somewhere between 20-25MB.
- Social media: Each service has its own specific limits based on time. For example, Instagram lets you upload 60-second videos to your feed, while Twitter allows up to 2 minutes and 20 seconds.
With the exception of social media platforms, sending a video typically depends on the file size of your video. So, if you’re frequently having trouble sending longer videos, then you might want to consider lowering your video settings on your iPhone. Capturing a video at too high of quality can cause the file size to balloon. To check your video settings, open the Settings app and go to Camera > Record Video.
How to send long videos on iPhone
Now that you know some of the requirements for sending longer videos, let’s talk about how to actually do it. Clearly, there are a handful of ways you can go about it. I’ll briefly go over some of the more popular ways.
Text messages
You already read about how text messages are really only suited for short videos. A rule of thumb is to keep them under a minute. Anything longer will be extremely compressed and hard to view.
iCloud Link
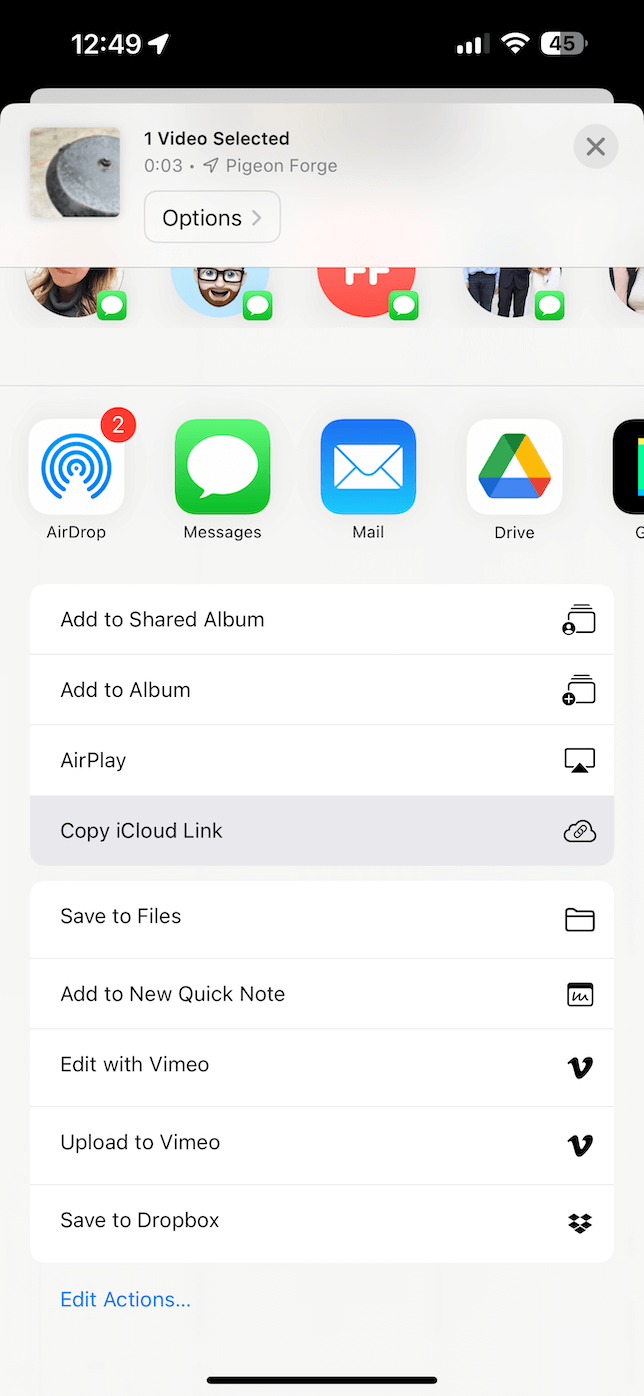
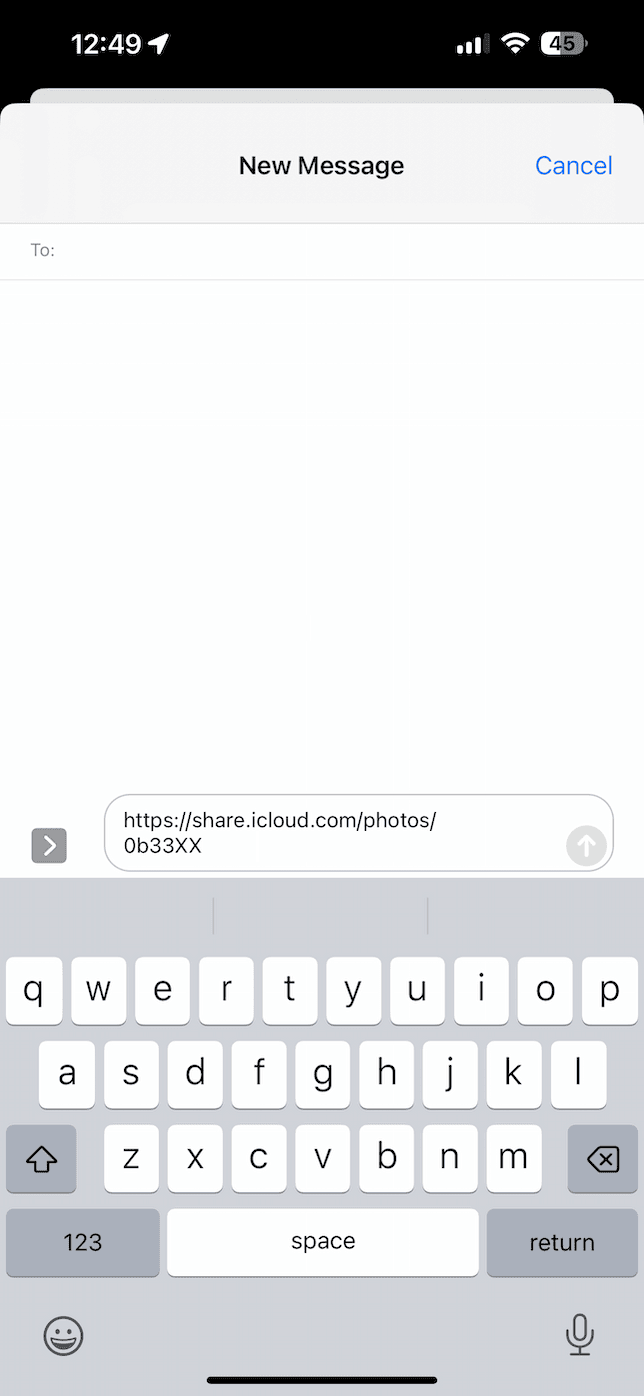
Earlier, I mentioned that if you are logged into iCloud on your phone, then the Messages app will automatically convert large videos to an iCloud link. But there’s also an option to manually send an iCloud link as well. Once you’re in the Photos app, this is all you need to do:
- Find the video.
- Tap the Share icon > Copy iCloud link.
- Now, you’re able to paste that link anywhere you want. For example, a text, email, or any other platform.
Another method I briefly talked about was email. You can do this directly in the Photos app by following these steps:
- Open Photos and find the video.
- Tap the Share button.
- Then, select your email app.

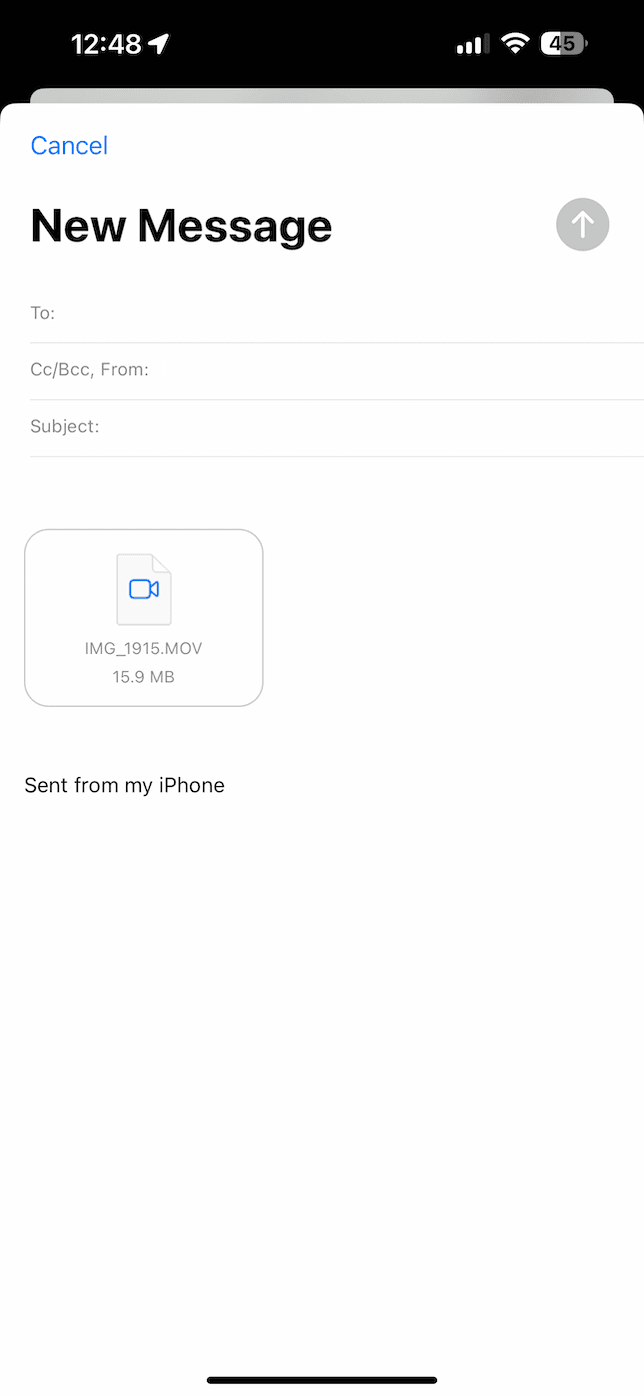
This should automatically attach the video to a new email. Again though, you’re likely limited to 20-25MB. So, you may need to use a different method for larger videos.
AirDrop
If you’re physically right next to the person or device you want to share your video with, the best option is going to be Airdrop. It’s Apple’s native method of transferring files over Bluetooth and Wi-Fi. Once you make sure both of those are enabled on your Apple devices, follow these steps to send your video:
- In the Photos app, select your video.
- Then, tap the Share button.
- Select AirDrop > choose the device you’re sending it to.
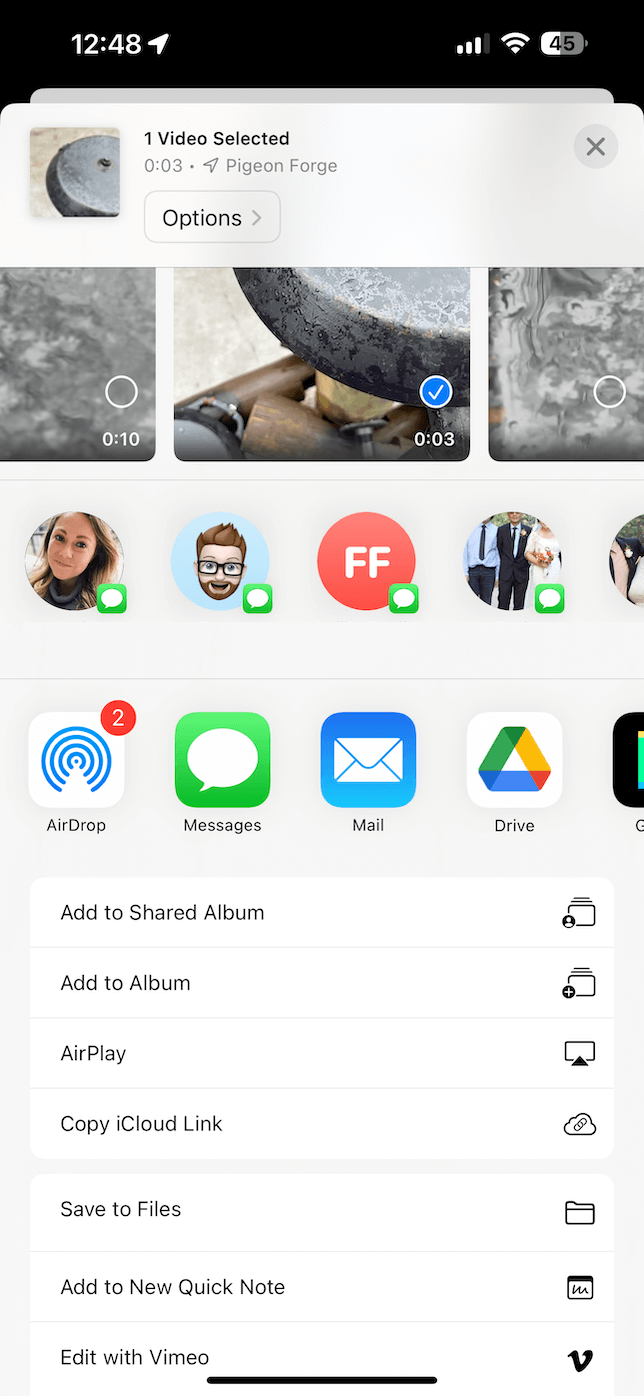

This could take a few minutes for it to go through, depending on how long your video is. So, just be patient with it as it’s transferring.
Third-party apps
Of course, if you’re not able to use any of the methods mentioned above, there’s no shortage of third-party apps that can help you transfer your videos. The first thing you’ll need to do for all of these is download their respective app on your iPhone and sign in with your account.
Some of the more common cloud-based apps you can use include, in no particular order:
- Google Drive
- Dropbox
- WeTransfer
How to remove duplicate photos on iPhone
While you’re trying to send some of your larger videos, you might go through your Photos app and realize that you actually have quite a bit of duplicate pictures in there as well. The quickest and easiest way to clean up that clutter is with CleanMy®Phone. It’s an app that uses machine learning to scan your photo library to help you quickly identify and remove duplicates from your iPhone. Here’s how easy it is to use:
- Download and install CleanMy®Phone on your phone.
- Open the app, tap Declutter > Scan, and let it scan your Photo library.
- Tap Duplicates. CleanMy®Phone will automatically select the version of each picture it thinks you should keep.
- Review those images and select any other you might want to keep.
- Then, tap Clean. They will be sent to the Recently Deleted album in your Photos app. Don’t forget to empty it.
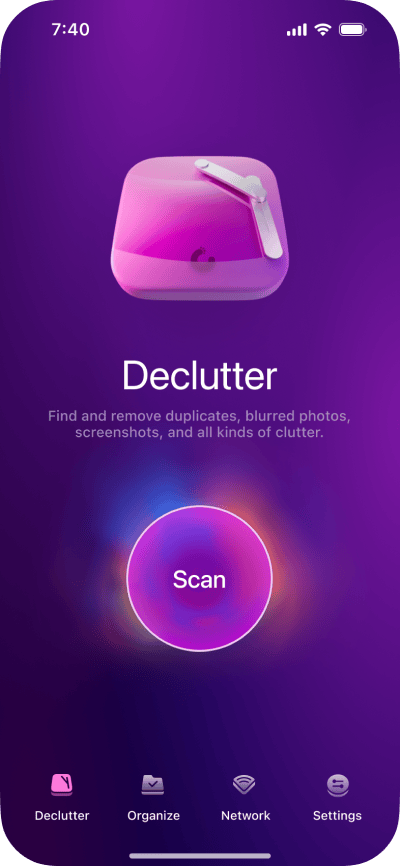
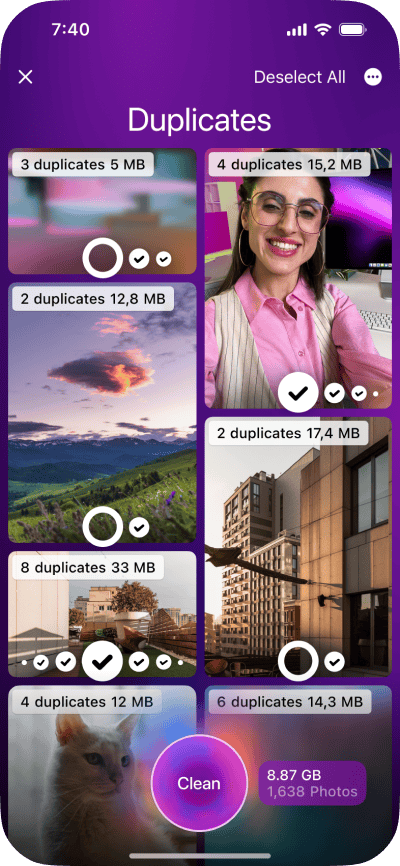
This module also finds screenshots, blurred images, screen recordings, and other digital clutter. To free up even more space, you can also use CleanMy®Phone and its Organize module to go through your similar-looking images.
Nothing takes the joy out of sharing a happy moment with friends more than an error message when you’re trying to send your video. But with the information in this article, hopefully, you’re able to find a method that works for you and the devices you have. Plus, now you know a secret for how to keep your photo library organized and free up storage space from duplicate photo clutter so that you always have room to record and share your favorite memories.

