Despite being marketed as one of the most secure devices on the market, iPhone users are still concerned about securing their iPhones. Because even though it might not be as vulnerable as an Android device, it’s not perfect. And when you start being too carefree with your iPhone security, you become an easier target.
But it’s not all doom and gloom. You can take a breath because you’re in the right place. This article will give you some iPhone security tips that will help show you how to protect your iPhone from being hacked.
Why do I need to secure my iPhone?
Like you just read – yes, iPhones and iOS are very secure, but they’re not unbreakable. They’ve had their fair share of security exploits in the past and some pretty big attacks at that.
Another thing to keep in mind is all of your online accounts. Because most services offer an iOS app, your iPhone is just one more touchpoint for everything from your bank account to your cloud storage.
So, if you do what you can to implement better iOS protection, your data and accounts will be safer in case your phone is targeted by hackers.
12 ways to up your iPhone security
While Apple is working tirelessly to improve the privacy of iOS, these are a few tips for how to protect your iPhone from hackers.
1. Keep everything updated
Software vulnerabilities are the most common ways hackers can get access to your device. That’s why there are constantly software updates being pushed both for iOS and individual apps.
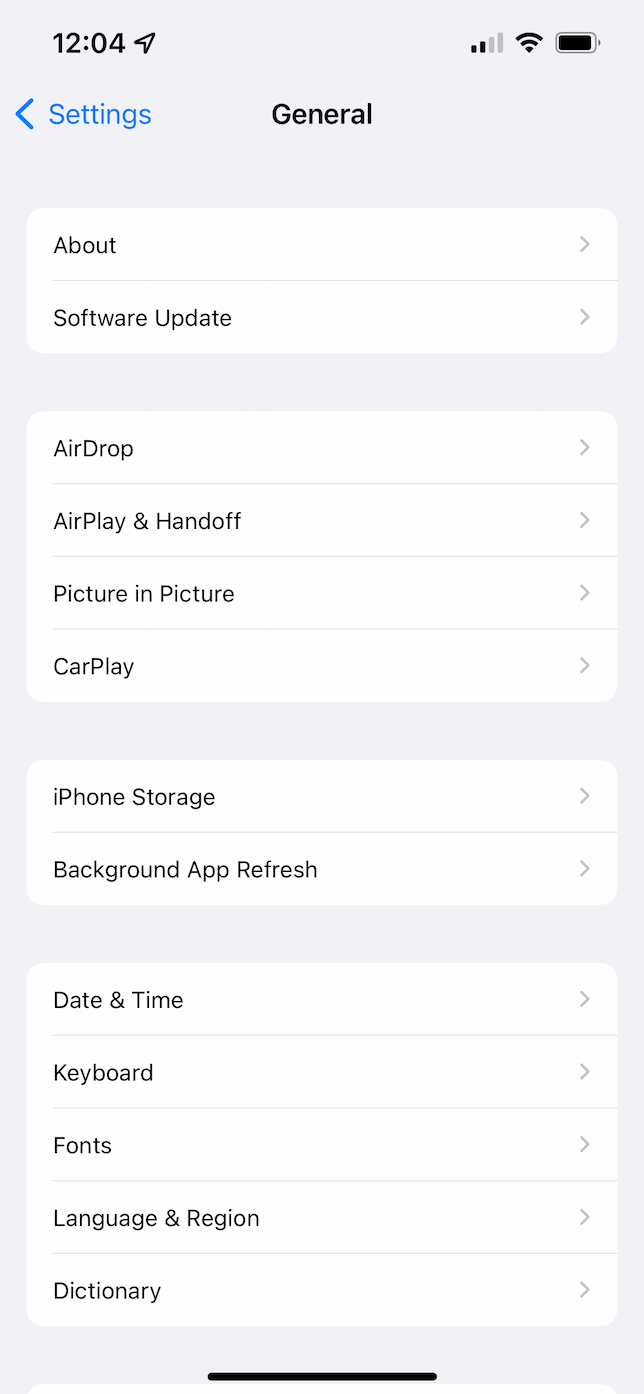
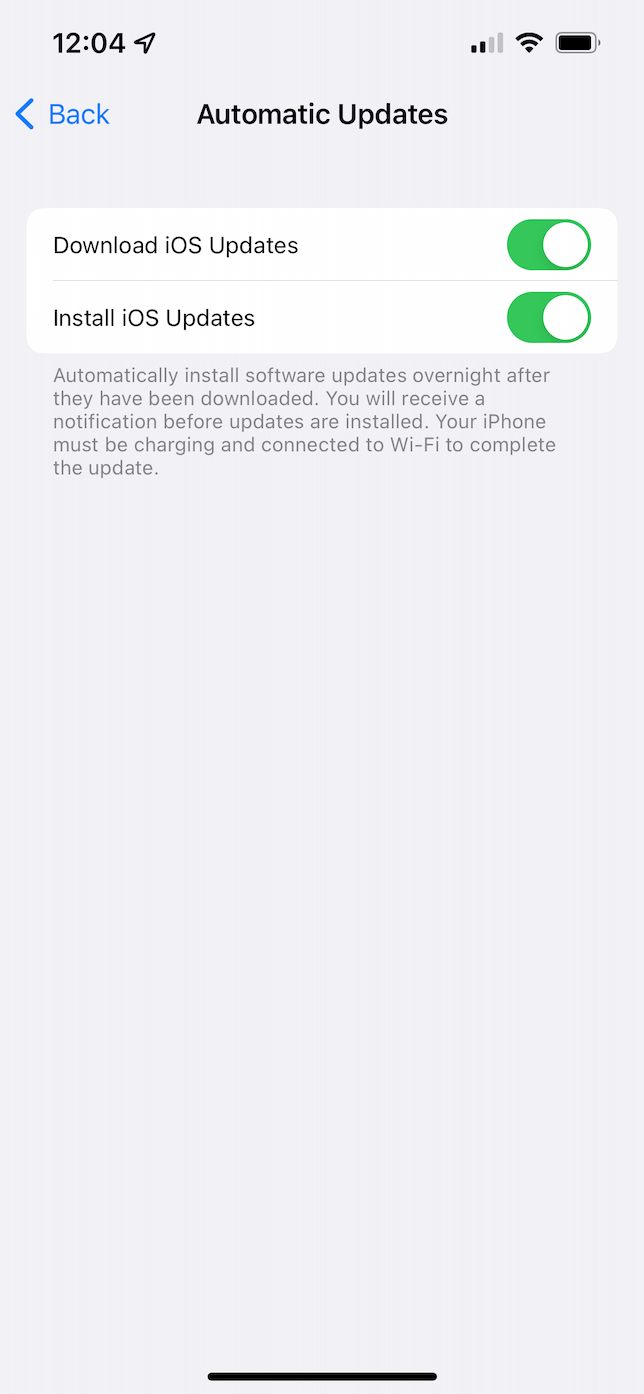
A good rule of thumb is to turn on automatic updates; that way, your phone will update while you’re sleeping each night without you having to think about it. To make sure automatic updates are turned on:
- Go to Settings.
- Tap General > Software Update > Automatic Updates.
- Make sure both Download iOS Updates and Install iOS Updates are turned on.
2. Use Face ID or Touch ID
Using Face ID or Touch ID, whichever your phone supports, is another great way to ensure only you have access to your phone.
If you’re unfamiliar with these, Face ID is the feature that scans your face to unlock your iPhone or uses features like Apple Pay. Touch ID has the same functionality but instead uses your fingerprint if your iPhone has a physical home button on the front.
If you want to make sure you have one of these turned on, follow these steps:
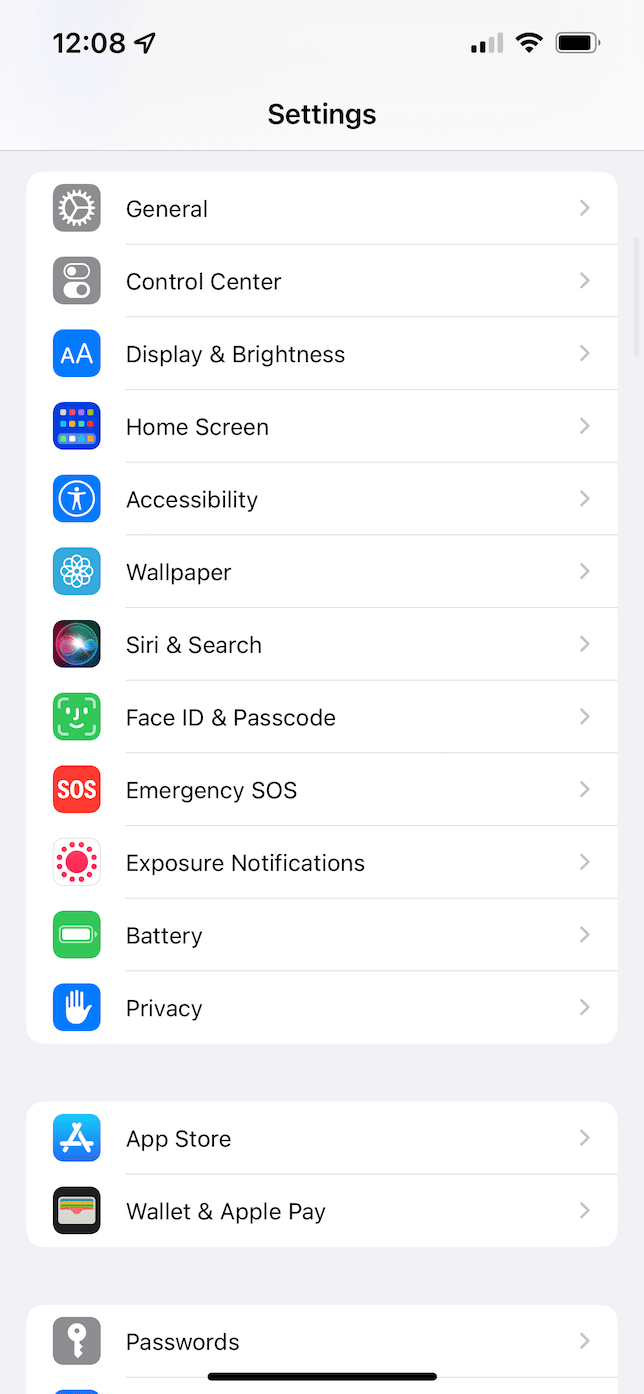
- Open the Settings app.
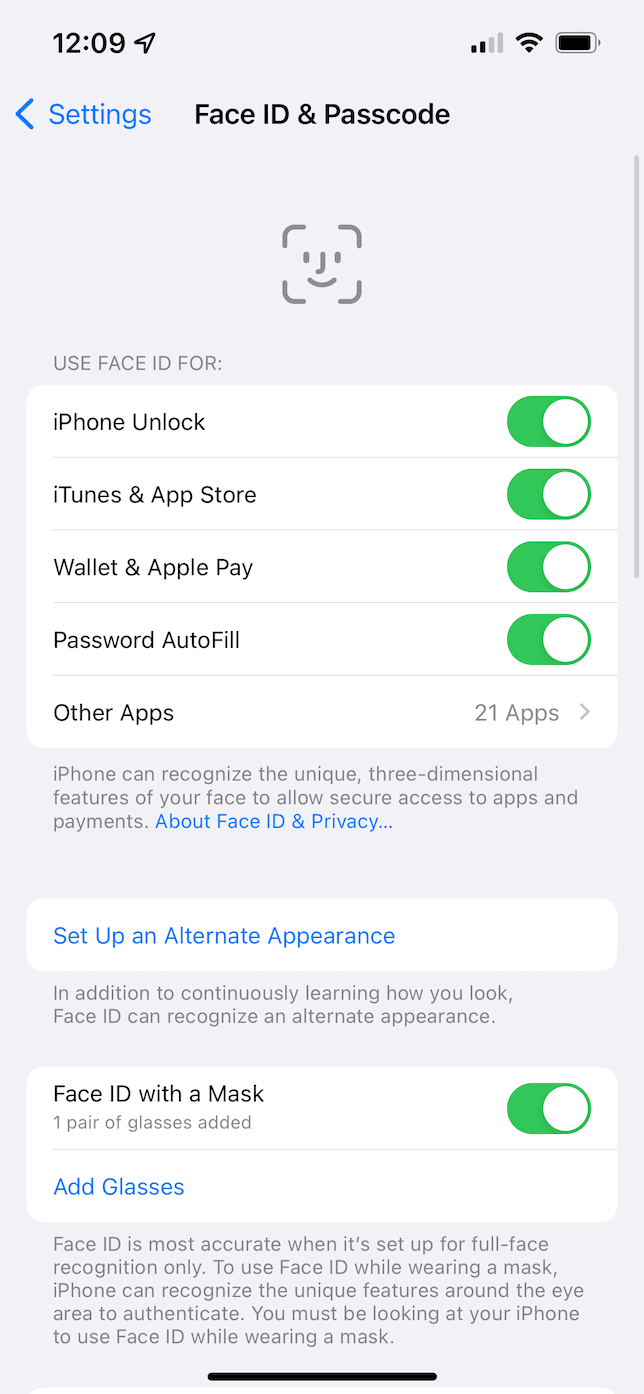
- Tap Face ID (or Touch ID) & Passcode.
- Type your iPhones passcode.
- Toggle on all of the features you want to use with Face ID or Touch ID.
3. Create strong passwords or use a password manager
Most people use one password for all of their accounts. Don’t do this. Because if a hacker can crack one of your accounts, they suddenly have access to all of your accounts.
A good rule of thumb for your passwords is to include capital and lowercase letters, a number, and a special character. Now, I know creating a unique password for all of your accounts that consists of all of those things can be difficult to remember. You can use Keychain in iOS or a third-party app like 1Password to help you store all of those passwords. Both of these apps will also recommend a strong, customized password for each of your accounts.
4. Control app and location data
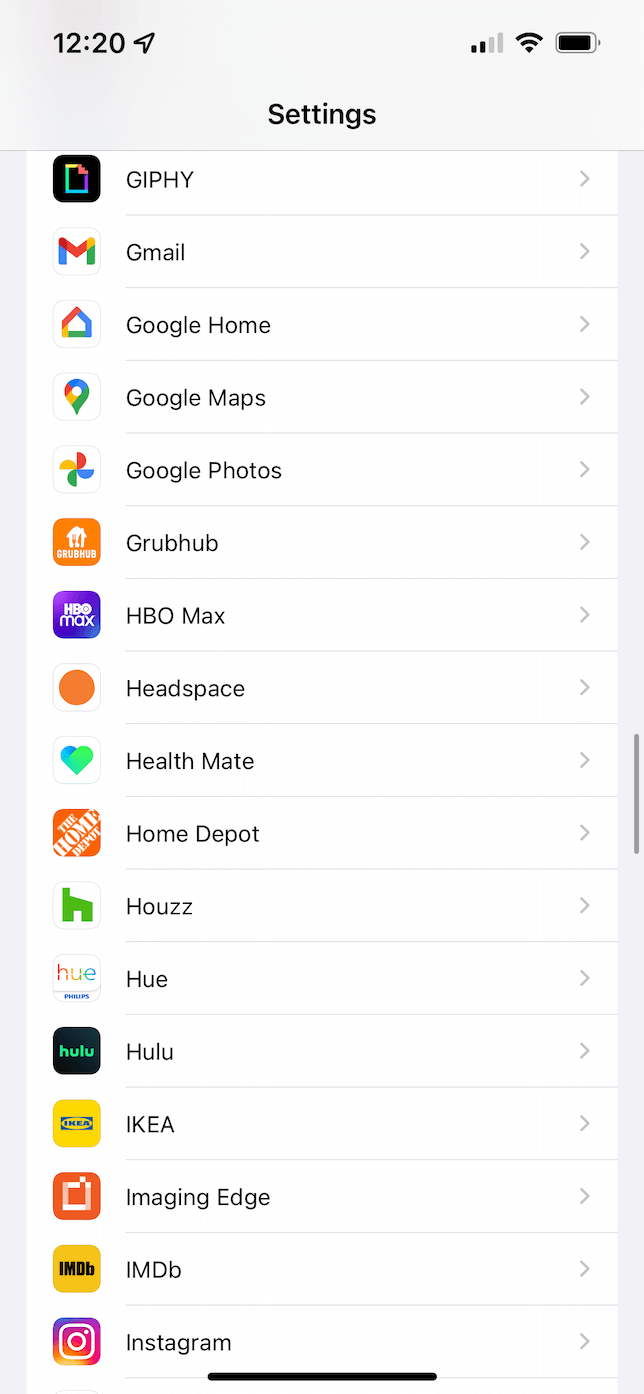
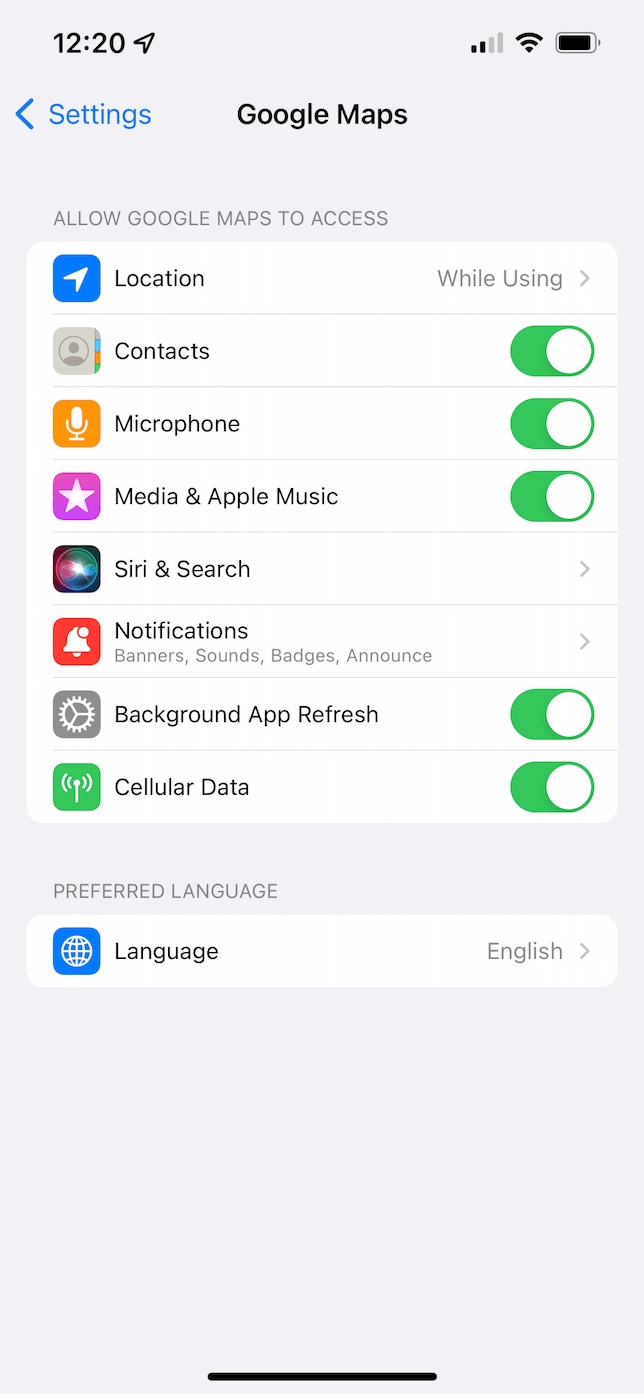
iOS will require you to give permission to each app you download. Either asking you to set the permissions for what you share with the app, how the app tracks your data, and even if it can see your location while using the app.
If you don’t remember what access you’ve given to a specific app, you can check it at any time by going to Settings and then tapping on the app.
5. Set up 2-factor authentication (or 2FA)
Many apps and online accounts will offer multi-factor or 2-factor authentication. You should always set this up if you’re given the opportunity. This requires you to log in using your password and a unique code assigned when you try to sign in.
If you can, try to avoid using SMS for 2-factor. This prevents a bad actor from changing your phone number to theirs, so they can be sent the unique code instead of you when they try to log in.
6. Don’t auto-join Wi-Fi networks
Using a public Wi-Fi network is just asking to be hacked. But, understandably, sometimes it cannot be avoided. Hackers will set up fake networks in public places to lure people in and steal their data. To better secure your iPhone, turn off the feature to auto-join unprotect Wi-Fi networks by following these steps:
- Open the Settings app.
- Tap Wi-Fi.
- Turn off both Ask to Join Networks and Auto-Join Hotspot.
7. Look out for fake apps
While Apple has a very stringent approval process for the App Store, sometimes fake apps slip through the cracks. These apps are created to look identical to other, more credible apps and will steal your data once you download them.
8. Watch out for “juice-jacking”
Public charging stations become a hotspot for iPhones in airports, train stations, museums, and coffee shops. But you should always try to avoid connecting directly to a USB charging port. That’s because hackers can modify them to “juice-jack” your phone: when you plug your phone into charge, a hacker is also connecting to your iPhone and stealing your data. Whenever possible, charge your phone using either the wireless Qi chargers or the power adapter.
9. Check for configuration profiles
iOS introduced configuration profiles as a way to help businesses manage their data on both company-owned and personal iPhones. But in the wrong hands, profiles can do more harm than malware.
The average iPhone user doesn’t need to have any profiles installed on their device. If you have one, you definitely should know what it’s for. It’s a good idea to periodically check to make sure a profile hasn’t somehow installed itself on your iPhone without you knowing about it. Here’s how you can check:
- Open Settings.
- Tap General > VPN & Device Management.
- If a profile is installed, you’ll see it on this screen. Otherwise, you’ll see no sign of it.
10. Use a privacy screen
If you find yourself using your iPhone to view secure content in public places, you might be worried about shoulder surfers — people who peer over your shoulder to steal a glance at your screen. You can buy a third-party screen protector that will make it difficult to see from any angle that’s not directly head-on.
The downside to using something like this is that they usually impact the color quality. So, if you need to review things for proper color consistency, you might want to avoid using a privacy screen.
11. Turn on Find My iPhone
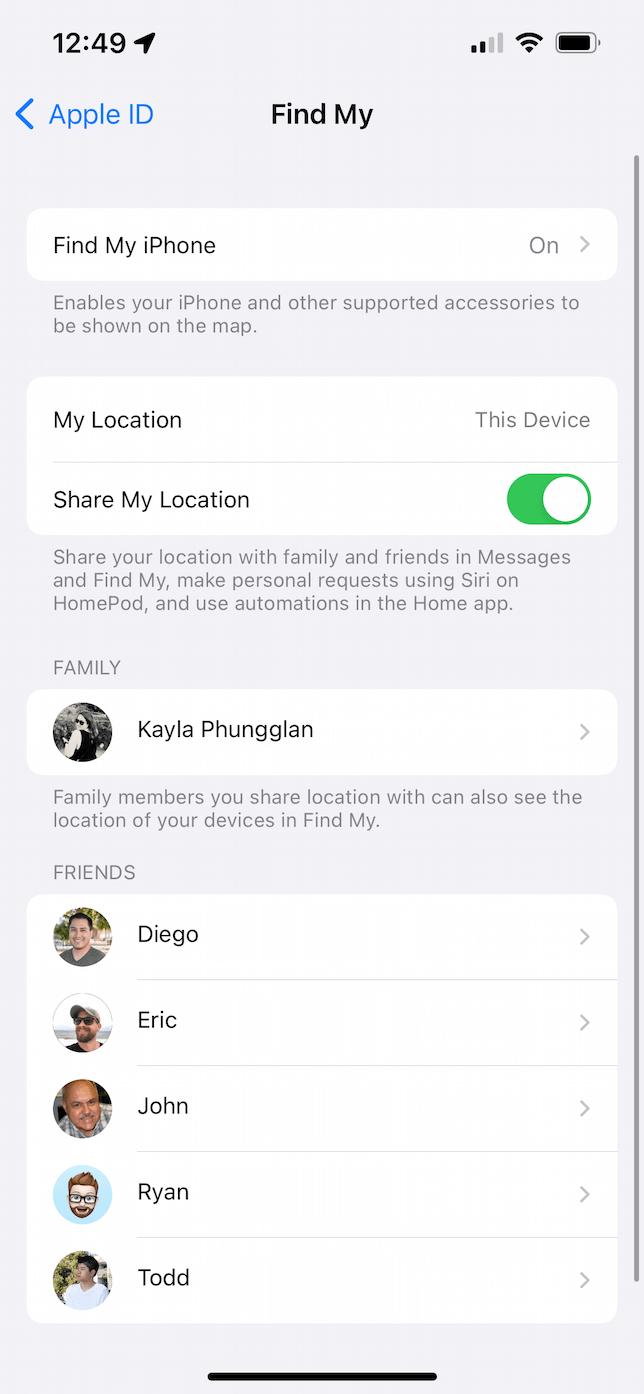
Losing your iPhone or having it stolen can be a huge headache. But, you can spare yourself some the worries by turning on the Find my iPhone feature in iOS. Sure–it will help you track the location of your phone. However, that’s not the only reason to use it.
Find My iPhone also allows you to remotely wipe your phone if it’s lost, giving you just a bit of peace of mind, knowing that your data won’t end up in the wrong hands.
If your phone was stolen, Find My iPhone will require your iCloud password before it can be activated again.
This is all you have to do to turn on Find My iPhone:
- Open Settings.
- Tap [your name] > Find My > Find My iPhone.
- Turn on Find My iPhone.
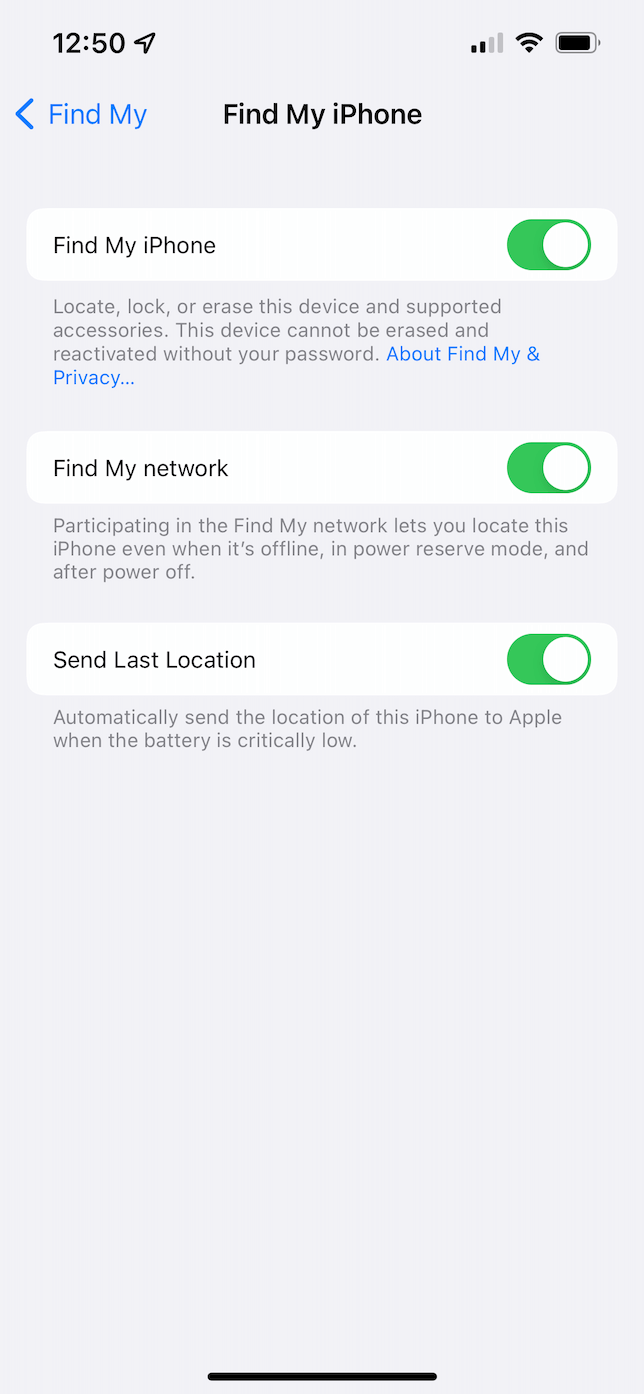
The other two options listed on this screen, Find My network and Send Last Location, are worth turning on. They’re designed to help locate your phone even if it loses cellular connection or the battery dies.
12. Keep an eye out for phishing
Phishing isn’t a unique problem for iPhones, but it’s definitely a real threat to iPhone users. Essentially, it’s when a hacker tries to mimic a legitimate website like iCloud.com or GMail.com to trick people into trying to log in. After a user logs in, the hacker has access to their username and password for that account.
Before logging into any account, always check the URL and never click on a link directly embedded in an email.
Even though iPhone is one of the most secure devices available today, there are still a lot of things you can do to optimize your iOS protection. Hopefully, after reading this article, you feel better equipped to protect yourself and your data.
