VSCO is a wildly popular photo editing app for iOS and Android with an array of tools to help you make your photos stand out. If you haven’t gotten creative with VSCO yet, we recommend giving it a download ASAP, and we’ve even got some tips to help you get started. Here’s everything you need to know about VSCO so you can join in the fun.
What’s the VSCO app all about?
VSCO is a photo editing and social sharing app known for its unique and massive collection of filters (called Presets within the app). Powerful editing tools can also be used to fine-tune your image, and you can even create your own VSCO Recipes to use over and over again.
The VSCO app also features a camera, where you can adjust settings that aren’t readily available on most iPhone cameras, such as white balance, ISO, and other capabilities that mimic the use of a DSLR camera.
As for the social side of VSCO, the platform is a creative photographer’s dream, with the ability to quickly find photos taken with various VSCO presets and different aesthetics. You can easily save photos or reshare them.
The Discover Page on VSCO displays curated collections of photos grouped together according to a common theme or preset, making it easy to find incredible photos for your own inspiration.
What does “VSCO” mean?
VSCO stands for Visual Supply Company, and the VSCO app (formerly known as VSCO Cam) was created in 2011. The founders hoped to revolutionize the world of photo editing and phone photography. Since then, the success of the VSCO has skyrocketed, and more than 200 million photos have been tagged with #vscocam on Instagram.
Getting started with VSCO editing
The app’s basic editing capabilities and a dozen presets are available to use for free simply by downloading the VSCO app. The premium version of VSCO is currently $19.99 per year and includes full editing capabilities and the use of more than 150 presets.
How to upload pictures to VSCO app
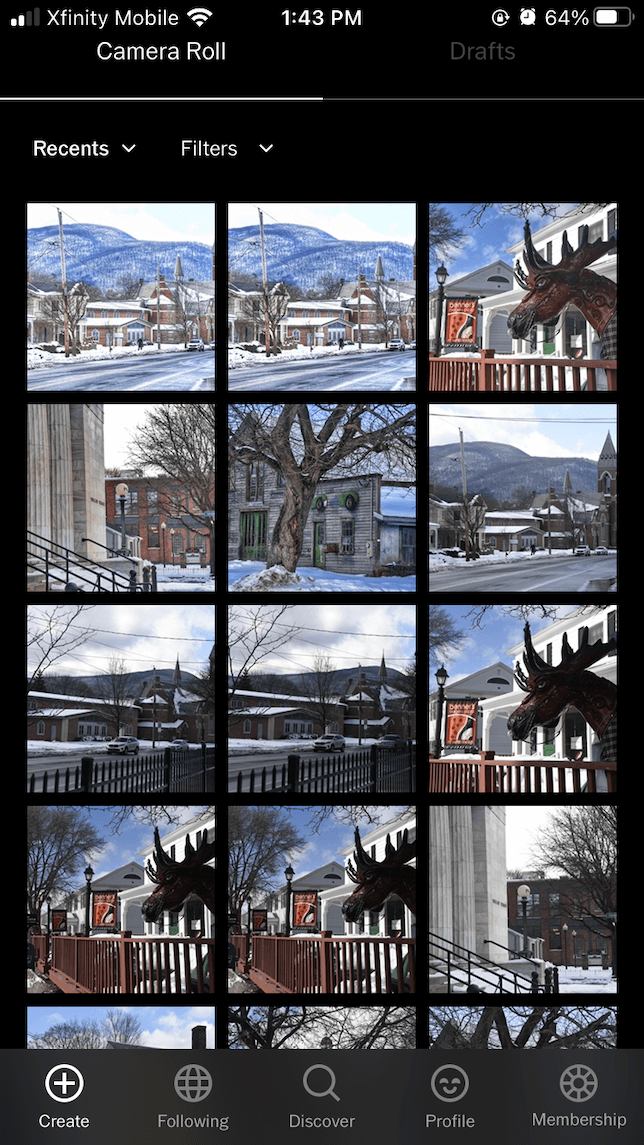
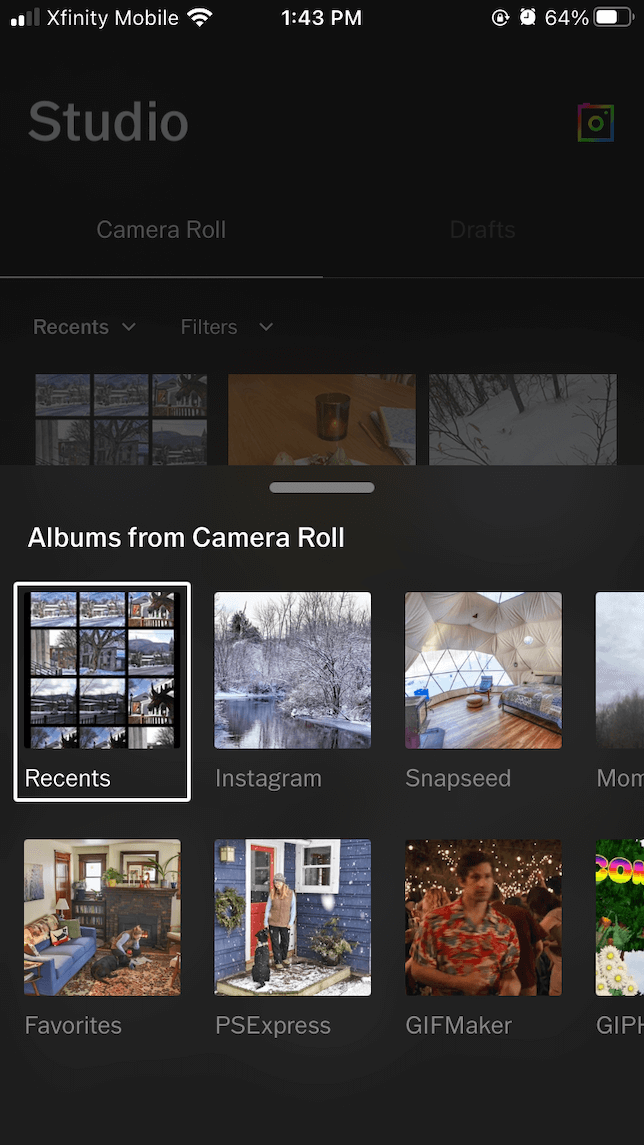
The first time you use VSCO, you will have to give the app permission to access your photo library. After that, all of your photos from your Camera Roll will be available as soon as you open the app. You can view all of your photo albums simply by tapping Recents above the photos on your screen and choosing an album. This makes it easy to locate and work with photos you’ve edited in other apps.
Can you edit RAW images with VSCO?
Yes, VSCO can edit RAW images! Photos captured in the RAW file format are uncompressed, and therefore gather more information from the scene you have captured than photos shot in JPG. This gives you more creative control during the editing process. RAW support is available for iPhone 6 and later models but, unfortunately, not for Android devices.
Within the VSCO app, you can edit RAW iPhone photos or import RAW images taken with most DSLR and mirrorless cameras. Once you import and edit your RAW file, you can choose to export the image as a JPG only.
Using VSCO presets
VSCO’s presets are what make this app so much fun to use. There are hundreds to choose from, and after applying one, you can easily tweak it to make your own Recipe.
How to apply a filter in VSCO
Here’s how to access VSCO’s extensive filter library:
- Open VSCO on your iPhone and choose a photo to work with.
- Tap Edit in the lower-left corner of your screen.
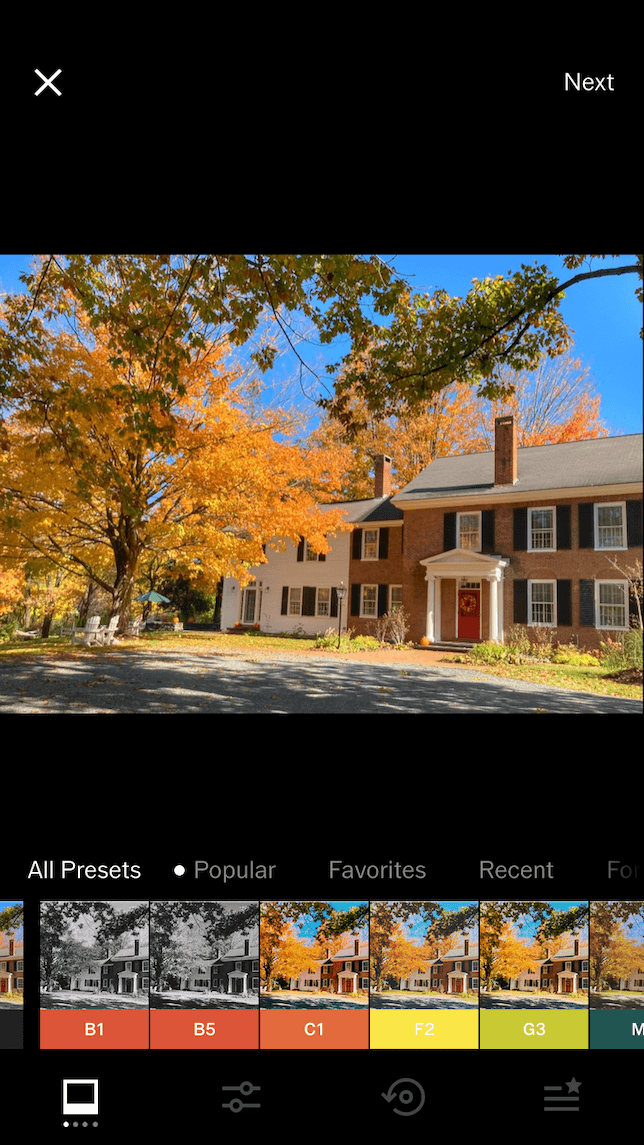
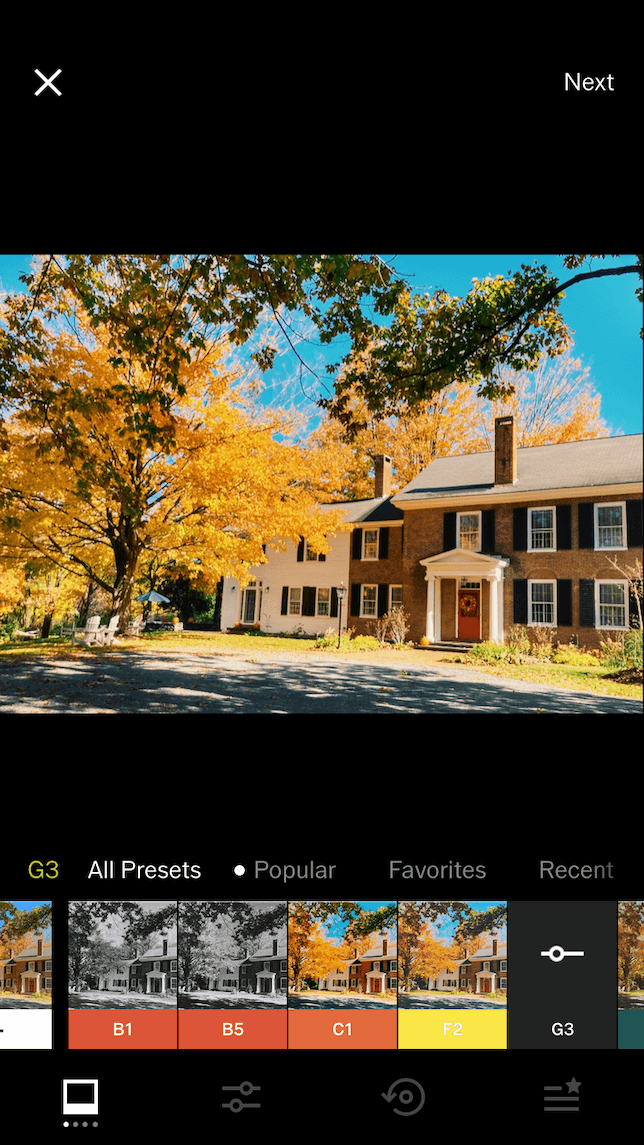
- Scroll through the photos at the bottom of the screen and tap on one to try it out. There are 10 free filters available and more than 130 with the purchase of a yearly subscription. After trying out a preset, all you have to do is swipe left to see the next in line. This makes it easy to try lots of presets in a short period of time.
- You can also sort the VSCO presets by tapping one of the categories listed above the presets. For example, if you choose the option For This Photo, VSCO will give you ideas using AI, based on what has worked for other users.
- Once you find a preset that works, tap the edit slider icon to make further adjustments or tap Next to save your photo or post it to VSCO.
How to pick the right VSCO filter for your photo
If you ask a dozen people to share their favorite VSCO filter, you will probably get a dozen different answers. In fact, many individual filters have loyal followings. Here’s an overview of some of the most popular VSCO filter collections, as well as some ideas for how to use them:
- VSCO SS Series: This is VSCO’s Street Series collection, and it’s great for adding a hint of grunge to your urban scenes and minimalist portraits. SS1–SS3 will mute highlights and enhance shadows to varying degrees.
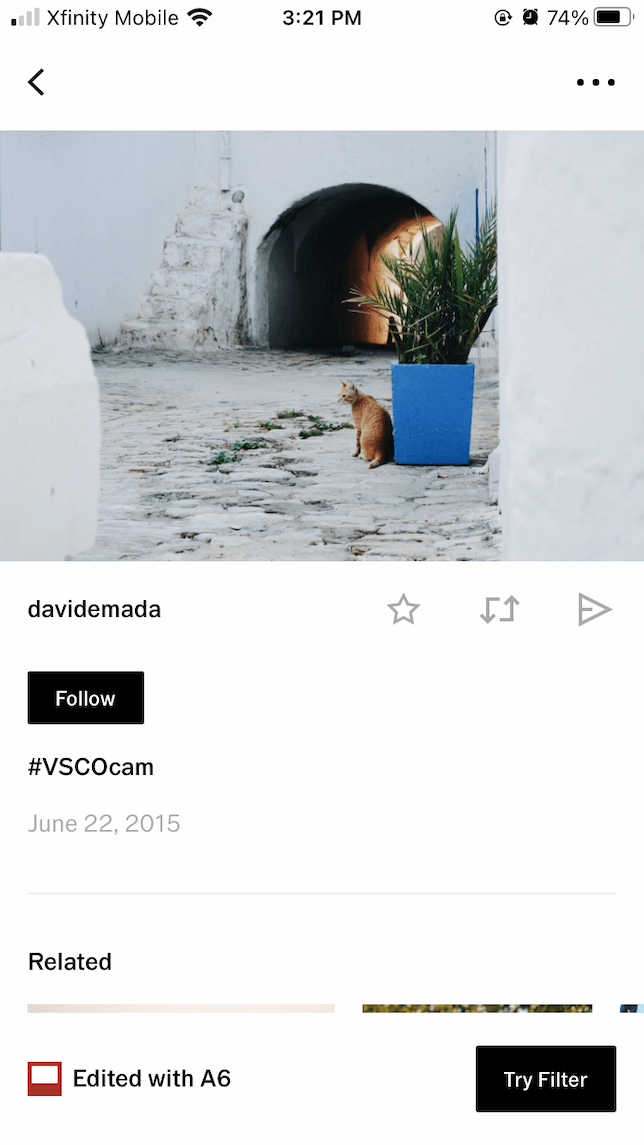
- VSCO A Series: This is the Analog/Aesthetic Series, described by some as the “clean” collection. With light fading, natural tones, and muted colors, this film-inspired collection works magic on portraits, candid street scenes, and interiors. While understated, the A Collection is beloved by millions of users.
- VSCO M Series: Go vintage with the M Series, which adds a desaturated look to your images, reminiscent of 1970s photo albums. The M filters look as good on portraits as they do on landscapes, and entire photo aesthetic movements have been built on this series.

Color correction with the VSCO editing tools
You can take advantage of VSCO editing tools on your photos before or after applying presets. You can even use them to create Recipes for presets of your own. Here’s an overview of how to use various editing tools for color correction in VSCO.
Saturation
Saturation refers to the intensity of colors in your image, with low saturation being more muted and high saturation appearing more vivid. Move the slider to the left to decrease saturation and make the colors more muted. Move it to the right to make the colors more intense.


White Balance
The way your camera reacts to varying shades of light doesn’t always make for a natural-looking photograph. For example, your camera’s built-in white balance can make snowy days have a blue cast and interior shots appear yellow. Fix this after the fact with the white balance tool in VSCO:
- Tap the edit slider icon on VSCO and select White Balance. This will open two sliders: Temperature and Tint.
- Slide the Temperature slider to the left for a cooler tone or to the right for a warmer tone.
- Slide the Tint slider to the left for a green/blue cast or to the right for a pink/purple cast.
- Tap the checkmark and then Next to save your photo.
Skin Tone
The Skin Tone slider can be used to correct skin tones within your photo so they appear more natural. The changes are subtle but worth experimenting with. Move the skin tone slider to the left to add warm skin tones and vice versa for cooler skin tones.
Split Tone
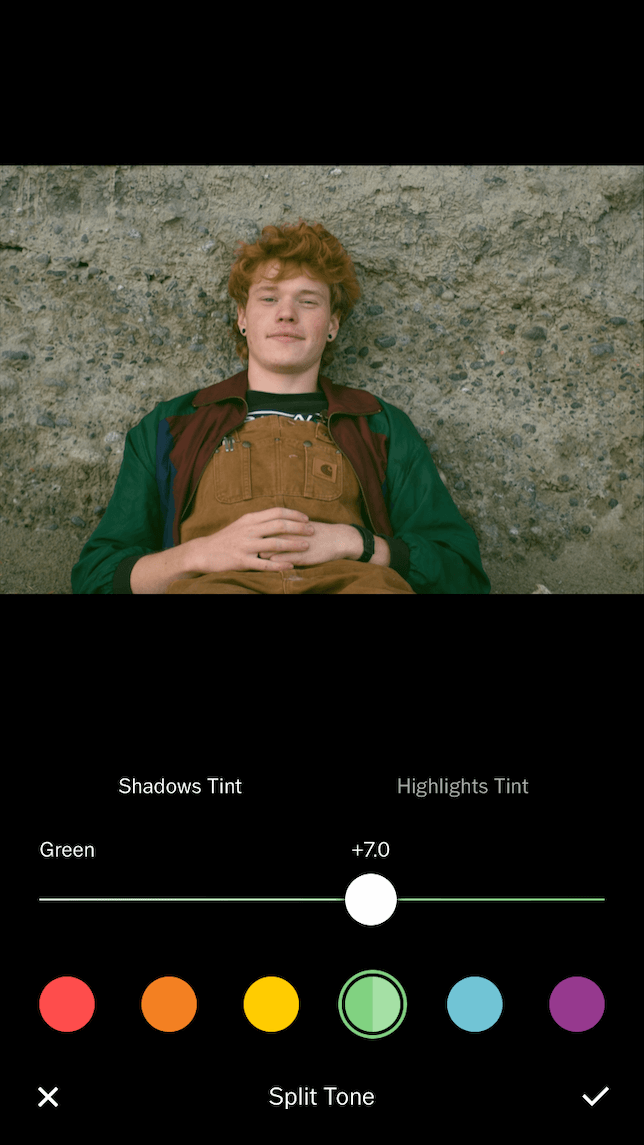
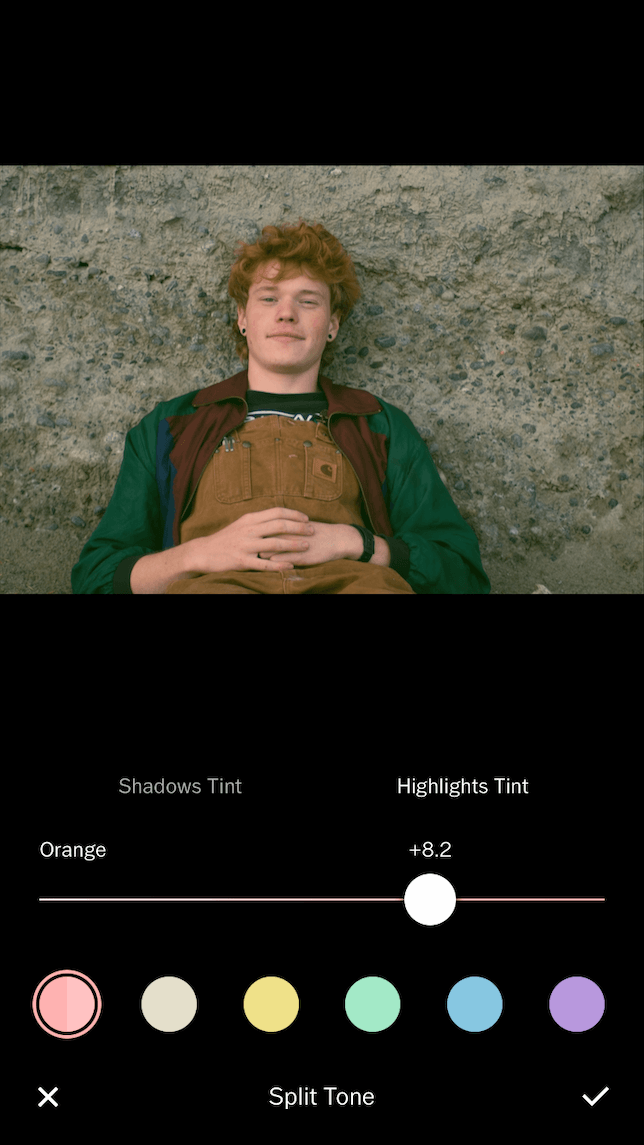
Split Tone adds a choice of color tones to the shadows and highlights in your photo. Use it to create a photo with tones of two different colors for a unique look.
To use Split Tone in VSCO:
- Open the VSCO editor and tap Split Tone.
- Choose Shadows Tint and then select a color to add to the shadowed part of your photo.
- Use the slider to adjust the strength of the tone.
- Choose Highlights Tint and then pick a color to add to the highlights in your photo.
- Use the slider to adjust the strength of the tone.
- Tap the checkmark and then tap Next to save your photo.
HSL
HSL is a premium tool that is only available with a VSCO subscription. Use it to change the hue, saturation, and lightness of individual colors within your photo:
- In the VSCO photo editor, tap HSL.
- Choose the color that you want to adjust within your photo. Then use the sliders to adjust the hue, saturation, and lightness of that color.
- Tap on the next color you want to adjust and use the sliders to make adjustments.
- When you’re finished, tap the checkmark and then hit Next to save your photo.
Adjusting light and structure in the VSCO app
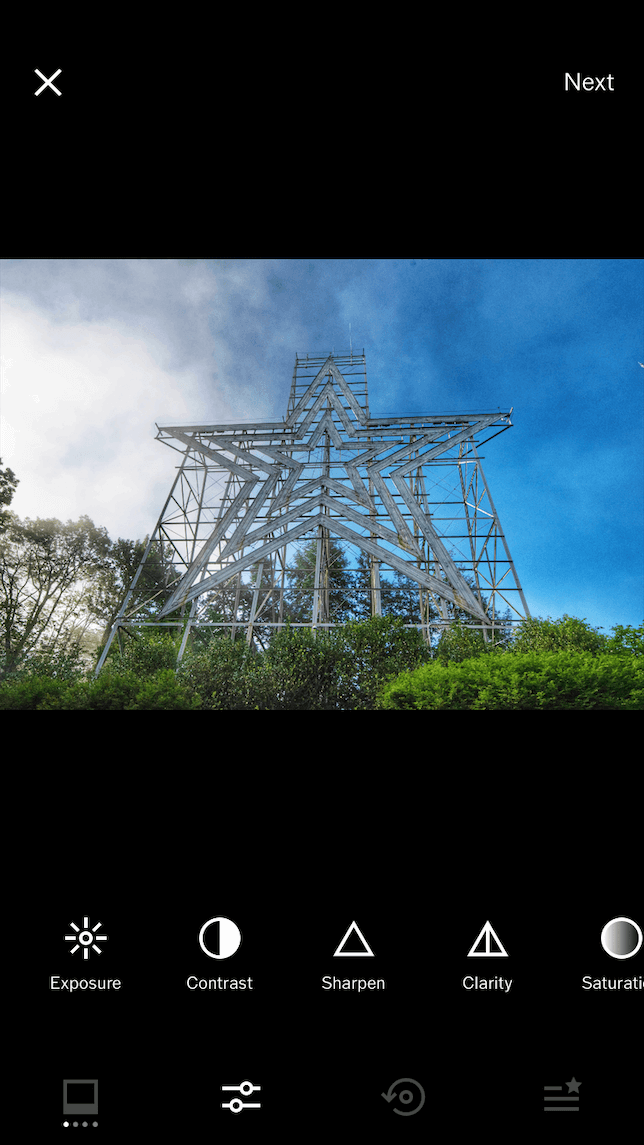
Now, let’s make some basic adjustments to your photo using VSCO editing tools. Within the editing interface, you can use a slider to make subtle or dramatic adjustments to the exposure, contrast, and clarity of your photo. It’s an easy way to fine-tune any VSCO presets that you’re using to make them uniquely your own.
Exposure
Exposure is the overall brightness or darkness of your photo. Because iPhone cameras don’t have a high dynamic range, parts of your photo may be over or underexposed. This is easily fixed with the Exposure slider. Simply move the slider to the left to darken your photo or to the right to lighten your photo.
Contrast
Contrast in photography is simply the difference between the lightest and darkest parts of a photo. Greater contrast makes your darks darker and your lights lighter. Less contrast makes the contrast between light and dark less pronounced. Move the slider to the left to decrease contrast and to the right to increase it.


Sharpen
The Sharpen tool can be used to increase the visibility of small details that have been captured but are difficult to see in your photo. Move the slider to the right to increase the sharpness of your photo.
Clarity
Like the Sharpen tool, Clarity adds detail to your photo. But in addition to increasing the sharpness of your photo, Clarity also enhances the mid-tones. Move the slider to the right to adjust the amount of detail added to your photo.

Tone
Tone refers to the adjustment of highlights and shadows in your image. The Tone tool includes two sliders — one for highlights and one for shadows. Moving the Highlights slider to the right will brighten up the highlights. Moving the Shadows slider to the right will lighten the shadows.
Grain
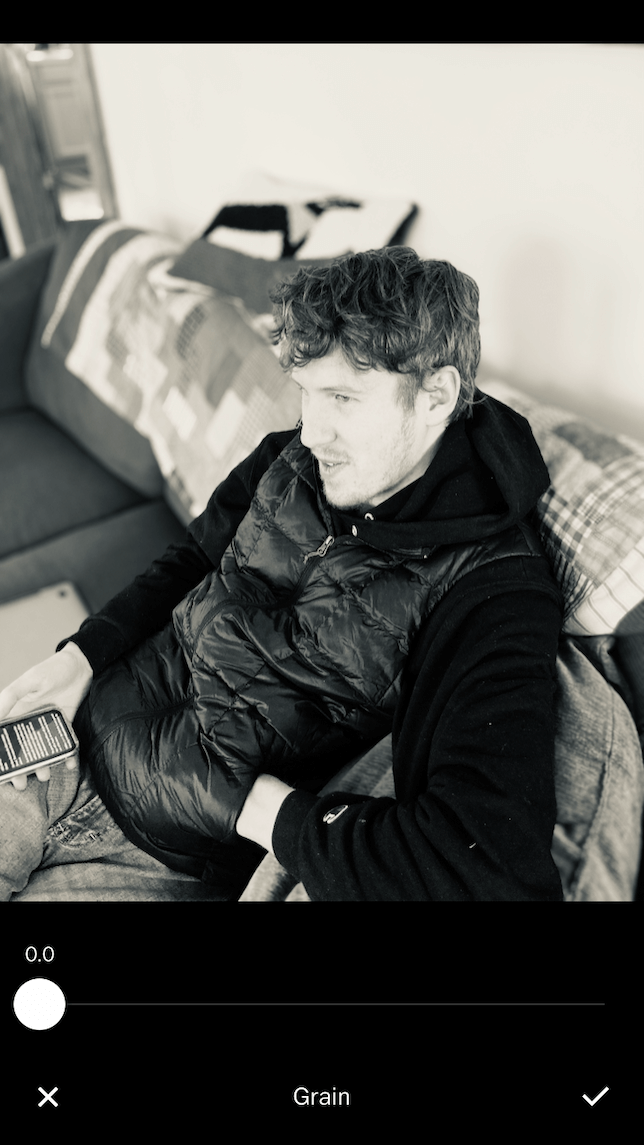
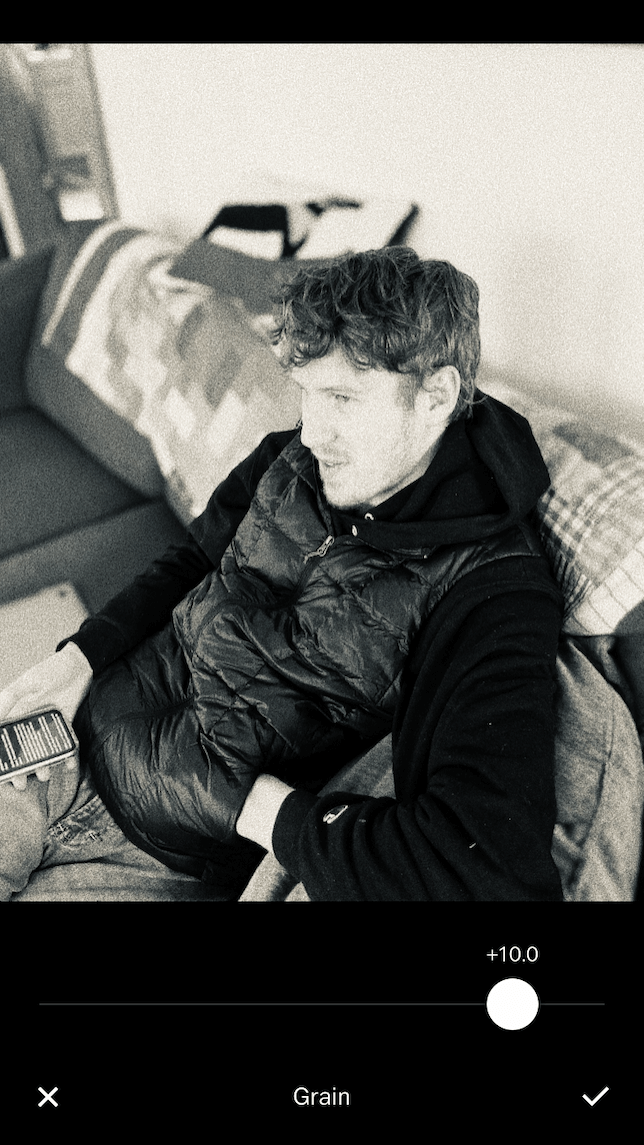
The Grain tool introduces noise into your photos. This is useful for giving a shot a vintage look and is great for black and white photos. Move the grain slider to the right to add a film-like grain to your photos.
Fade
Going for a washed-out look in your photo? The Fade tool reduces the dynamic range in your photos, making your highlights and shadows less pronounced. The farther you move the fade slider to the right, the more washed-out your image will be.
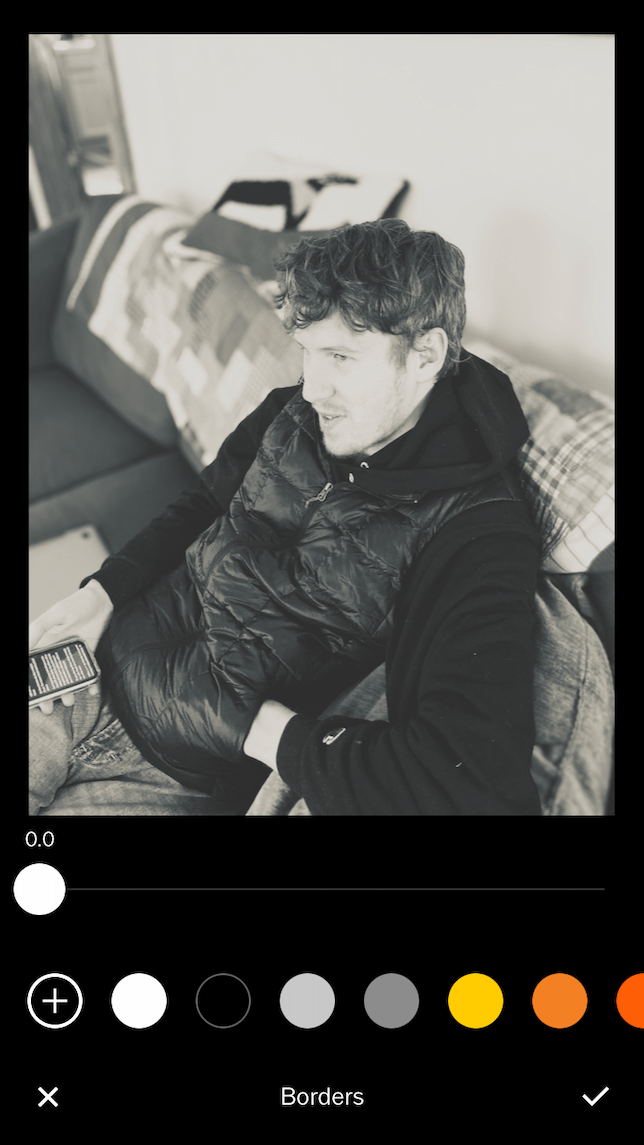
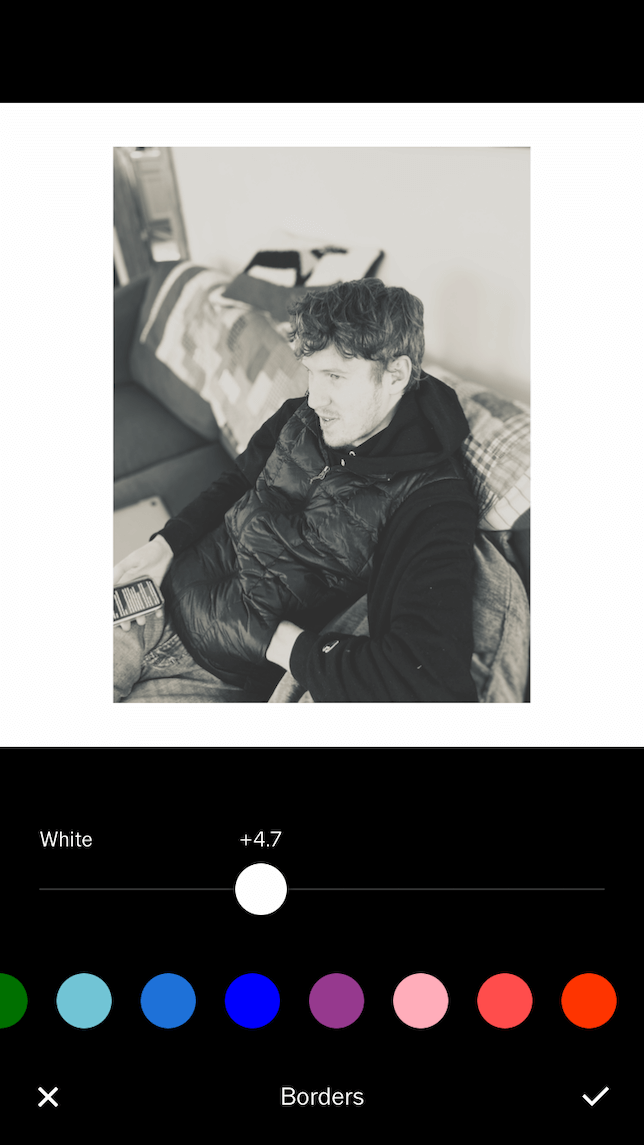
How to add a white border to a photo with VSCO
You can add a white border to your VSCO creation when you have finished editing, but this is a premium feature only available to subscribers. Here’s how to add a white border with VSCO.
- Scroll through the editing menu and choose Borders.
- Tap the white circle.
- Move the slider to adjust the width of the border.
- Tap the checkmark and select Next to save your photo.
How to save your photo editing preset in VSCO
Have you made a series of edits that you’re particularly proud of? You can save the process as a custom setting — what VSCO calls a Recipe — to use the same process on other photos. Here’s how:
- When you have finished making edits to a photo, tap the Recipe icon (a small circle inside a larger circle with an arrow on one side).
- The Recipe will show all of the adjustments you’ve made to the photo.
- Tap + and give your Recipe a name.
- When you want to apply your Recipe to a new photo, simply tap the Recipe icon and choose your Recipe. Note that you can only create and save one Recipe with the free version of VSCO.
So there you have it! A complete overview of the VSCO filters and editing tools to jumpstart your creativity.
